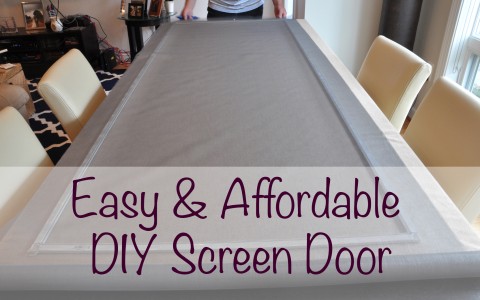
You’ve probably heard of the honey-do list, but when my father comes to visit it’s more of a Daddy-do list.  Ever since I moved into an apartment in college I’ve always had a list of things for him to fix or do while he’s visiting me.  There was one time my parents came to visit and my dad walk in the door, looked at me and said “so what do you want me to do this time?”.  I couldn’t help but chuckle a little.   Although he might sometimes pretend to be annoyed by my wanting him to do stuff around my house or fix my computer I think deep down he loves it.

So when he arrived a few weekends ago for a visit I already had my daddy-do list planned out.  The last time he visited us in the condo he installed a dimmer switch in the living room.  The best part of the dimmer switch in the living room is we can make “movie theater” lighting when watching tv. I love it. I mean who doesn’t like lights that dim?!?!

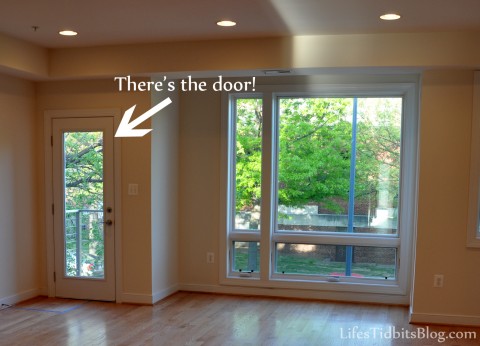
Anyways, I wanted him to install a couple of additional dimmer switches in the condo, but the big project I had in mind was building us a screen door.  As I had mentioned in my herb garden post we have this little “smokers balcony” off our living room.  Since the weather in DC is finally getting cool it’s nice to open the window and the fresh air in.  That’s front door offers a lot of air, but doesn’t keep the bugs out.  Seriously my legs and hands were eaten alive by the mosquitoes that got in our house.  So you know what that means … clearly we need a cheap/DIY screen door.

Home improvement DIY Screen Door | Life's Tidbits

That picture was taken prior to moving in.  I promise we now have furniture in the living/dining room.  My dad was up to the challenge and here’s how we (read my dad) made the screen door.

What you need:

First he measured the door frame and then cut the aluminum screen frame down to size.  We purchased 4 pieces of frame.  We probably should have bought an extra just in case because somehow we cut the frame a little too small.  Luckily my dad is a master problem solver and with a little cooking twine we were able to add in the extra amount of space we need.

After my dad figuring out how to fix our little measuring problem we laid the screen out over the door frame.  Make sure to give yourself a little extra screen around the edges.  You don’t want it too tight or the screen door will bend inwards.

Take the screen spline and roller and attach the screen to the frame.

Then we cut off the extra screen along the edges.  We realized there was nothing to hold onto when pulling the screen door into place.  Sooooo Daddy to the rescue as always.  We put screws in to use as handles.  At some point I plan to go ahead and buy one more piece of aluminum frame and attach that so the handle is a little easier to grab.  For now the screws are working out just fine!

So there you have it. A pretty easy, cheap and quick DIY screen door.

Best part is you can barely tell there’s a screen door in there unless you get close up to it.  Here’s your close up:

Happy home improvements and a little DIY!

Don’t forget to leave your tidbit by commenting below!

Share

This picture was taken in 2009 when some friends, the husband and I went to Ixtapa, Mexico for vacation.  It was a fantastic trip and the views were beautiful.  I love the way the palm trees are reflected in the pool as the sun was setting.

Check out more pictures from a different Mexico vacation here.

Happy Friday!

Don’t forget to leave your tidbit by commenting and/or add Life’s Tidbits to your RSS Reader :)

Share

Our condo has a little balcony off the master bedroom.  After moving in we put some old chairs on the balcony and sat out there every once in a great while.  Lacking something comfortable to sit on didn’t make the space too inviting.  When my parents and sister came to visit and see the condo for the first time my mom and I made a list of the stuff we still needed to purchase.  The balcony furniture made it to the top of the list pretty quickly.

That afternoon the husband and my dad did “guy things”.  Like going to Home Depot, installing a dimmer switch in the living room and I believe there was some sitting on the couch with beers in playing on the laptop/ipad (but I could be wrong…wink wink).  Meanwhile my sister, mom and I headed out to do some shopping.  We had no luck after going to World Market and Home Goods.  Despite feeling a little defeated we headed over to Pier 1 Imports to see if they had anything.  We walked in and almost immediately we fell in love with plicker (plastic wicker) red chairs.  They were comfortable and complimented the accent red tamale wall in the master bedroom.  My mom roamed around the store and spotted nested tables that she thought would work well on the balcony.

My mom obviously knows my style well. I really liked the nested tables.  I took pictures of the chairs and tables with my Driod and sent them to the husband for approval.  He was quick to respond with a yes on both, so we were in business!!  To make sure we loved the new items I had my mom and sister sit down and pretend like they were having drinks.

After playing tetrus with the car and new furniture we FINALLY were able to get everything in and headed home.  I really thought we might have to return everything and go back and buy it when we had a bigger car!

The balcony is so inviting now that it’s had a furniture face lift.  I love our little balcony and it’s perfect for morning lattes, afternoon drinks, reading and relaxing.  Sophi likes the balcony too … can you see her sneaking into the picture?

Heck the balcony is even great for an intimate dinner and since the weather in DC is not longer 90 plus degrees each night we even had dinner on the balcony the other evening.

Had to squeeze that last Instagram picture into the post :)

Happy Outdoor Living!

Don’t forget to leave your tidbit by commenting and/or add Life’s Tidbits to your RSS Reader :)

Share

I have always been into photography.  Since middle school I’ve followed in my mother’s foot steps and taken/printed TONS of pictures.  There are albums and albums of pictures at my parent’s house and even more at our condo.  Given my love of photography I thought it might be fun to share a photo each week.

Since this is the first photo of the week I though it was appropriate to share one of the first pictures I took with my Nikon D90.  This picture was taken the weekend of my sister-in-law’s wedding in Missouri.

Although it’s suppose to be photo and not photoS, I still wanted to share one more picture from that trip to Missouri.

Happy Friday!

Don’t forget to leave your tidbit by commenting and/or add Life’s Tidbits to your RSS Reader :)

Share

I find it odd that I’m perfectly capable of caring for a dog, but give me a plant and the thing is dead in less than a week.  I mean it’s a serious black thumb problem I have.  We offered to water our neighbor’s plants while they were on vacation and I made the husband do it since I was afraid I would instantly kill them all.  Despite my inability to keep plants alive I’ve always wanted to have a little herb garden.  The thing is when I got into cooking recipes would call for fresh herbs.  So I would buy a package of mint, for example, and then only use two tablespoons.  The rest would sit in the refrigerator and go bad in no time.  Those little packages cost like $2 and you can buy a pre-planted herb for $2.99.  The way I see it is my black thumb is not only killing the plants, but my wallet too … hahahaha!

So this weekend the husband and I went herb shopping.  My big thing was I didn’t want to start from seedlings.  Apparently Home Depot doesn’t carry herb plants, only seeds.  I just assumed Home Depot would have them, so when they didn’t we had to go a different route.  We found basil at the grocery store and then chives, mint and parsley at a flower shop.  If I’m able to keep these four herbs alive I plan to add rosemary and thyme to my little “garden”.

We laid down some plastic so the potting soil didn’t get all over the hard woods and started planting the herbs.

When I was done planting the husband and I talked about where we should put our herb plants.  We have this little “balcony” off of our living room, which I’ve never really known what to do with.  A while back I stuck an odd chair out there.  I wouldn’t say it is an eye sour, but not exactly elegant either.  If I am able to keep these herbs alive I think it will be time to say goodbye to the old chair and hello to our herb garden.

But for now a little cohabitation will be going on. I don’t think the chair will mind sharing the space. :)

After only one night my basil is already wilting. I’m praying it perks back up.  This is not exactly the start I was hoping for.

People, please cross your fingers and channel some of your green thumb vibes my way!! I really hope these little guys make it.  Any tips for me on how to keep these little guys alive?

Don’t forget to leave your tidbit by commenting and/or add Life’s Tidbits to your RSS Reader :)

Related Posts Plugin for WordPress, Blogger...
Share