PEOPLE  it is Tasty Tuesday!  What are you making for dinner tonight?  Last week I love made some spicy chicken curry for the hubby.  This take on chicken curry is definitely A LOT healthier than what you would get from a restaurant.  If you don’t like spicy stuff I suggest not using any (or as much) jalapeno and use all regular curry powder instead of the hot madras curry powder.  This recipe can totally be tweaked to fit your pallet and is pretty forgiving!

Ingredients
1 medium onion, chopped
3-4 cloves garlic, chopped
1/3 jalapeno, chopped
1 tablespoon garam masala
1/2 teaspoon ground cumin
1/4 teaspoon of ground cloves
2 tablespoons vegetable oil
1 tablespoons hot madras curry powder
1 tablespoon curry powder
3/4 cup water
1/2 cup condensed milk (Fat Free will taste just as good as full fat)
5 chicken breasts, cut into chunks
Kosher salt
Steamed broccoli
Steamed white rice, for serving

Chop the onion, garlic cloves and jalapeno.  Get out all your spices so you have them ready to use.

In a food processor combine the onion, garlic, jalapeno, garam masala, cumin, and cloves. Process to make a chunky paste.  Heat the oil in a large Dutch oven over medium heat. Add the onion mixture, curry powder, and 1/4 cup water. Let fry 4 to 5 minutes.

Add another 1/2 a cup of water as well as the 1/2 a cup of condensed milk.

I like to precook the chicken on my grill pan, however you don’t have to.  Precooking the chicken adds a pan to clean, but also speeds up the overall cooking time.

Add chicken pieces and salt to taste. Bring to a boil. Simmer until the chicken is cooked through, about 30 minutes.  If you precooked the chicken I would say about 10 minutes instead of thirty.  Add the steamed broccoli to the mixture.  Serve over rice – makes about 5 servings.

Bon Appetit!!

Don’t forget to leave your tidbit by commenting and/or add Life’s Tidbits to your RSS Reader :)

Share

When the husband and I hosted a Super Bowl party this year a friend made these cute little oreo truffle footballs.  These little guys were extremely addictive.  So yummy!!!!!

Our friend was kind enough to share the recipe with me after a few reminder *wink wink*.  Although I’ve been meaning to make the truffles for a while there hasn’t been a good occasion to give the recipe a try.  We had some friends over this weekend to check out the new place so I made the oreo truffles as a littler treat for  our friend.  They were a big hit!

Ingredients:

1 package oreo cookies (entire cookie including the cream center)
1 8oz. package cream cheese (softened)
white chocolate

Crush cookies in a food processor or place them in a ziploc bag and crush into a fine consistency.

Stir in softened cream cheese.  I had to use my fingers to get it all mixed together well.  The suggestion to use the back of a large spoon to help mash the two together just wasn’t working for me.  Or maybe it was taking too long, but either way my hands were very effective.

Roll the mixture into 1″ balls and place on wax paper covered cookie sheet.  I would actually suggest doing 1/2 inch balls. These little guys are super rich and the 1″ balls is about 2 bites. I think having one bite truffles would have been a little better.

Melt white chocolate as directed on the package and then dip balls into chocolate, tap off extra and set aside on wax paper covered cookie sheet to dry. (Tip:  it helps to freeze the uncoated balls for a few minutes to keep the mixture from starting to fall apart in the melted chocolate.)

Once dry, refrigerate.  This makes about 36 truffles (or 72 if you do the smaller truffles as I suggested).  I mean seriously these are SO easy to make and they taste SOOOO good.

Happy Cooking!

Don’t forget to leave your tidbit by commenting and/or add Life’s Tidbits to your RSS Reader :)

Share

I have always loved me some chocolate. Make that a molten lava cake a la mode and I’m ALL IN!  As someone with a serious sweet tooth I often make restaurant choices based on their dessert menu.  On weekends when I was home from college my mom would ask me where I wanted to go to dinner. I would almost always opt for The Lyceum (which apparently is now closed – just found that out when Googling it).  Anyways, I found Paul Deen’s recipe for Molten Lava Cakes and decided to give it a whirl.  Let me just say it is YUMMMMMOOOO! I could eat it everyday, but everything in moderation, right?!

Ingredients:
6 (1-ounce) squares bittersweet chocolate
2 (1-ounce) squares semisweet chocolate
10 tablespoons (1 1/4 stick) butter
1/2 cup all-purpose flour
1 1/2 cups confectioners’ sugar
3 large eggs
3 egg yolks
1 teaspoon vanilla extract

Directions:
Preheat oven to 425 degrees F and grease 6 (6-ounce) custard cups.  Melt the chocolates and butter in the microwave, or in a double boiler.  A double boiler is simply steaming water that doesn’t touch the glass bowl above it.

Combine the flour and sugar in a bowl and the eggs/yolks in another bowl.

Add the flour/sugar mixture to the melted chocolate/butter.

Stir in the eggs and yolks until smooth. Stir in the vanilla.  Divide the batter evenly among the custard cups.

Place in the oven and bake for 15-18 minutes. The edges should be firm but the center will be soft and a little runny.  If you plan to save a few lava cakes for another night like we did, I would suggest slightly under cooking them say 12ish minutes.  That way when you reheat them you won’t cook the center through.

Run a knife around the edges to loosen and invert onto dessert plates.  Add a scoop or TWO of vanilla ice cream to make lava cake a la mode!  Serve and enjoy. Super yummy!!!

Happy cooking!!

Don’t forget to leave your tidbit by commenting and/or add Life’s Tidbits to your RSS Reader :)

Share

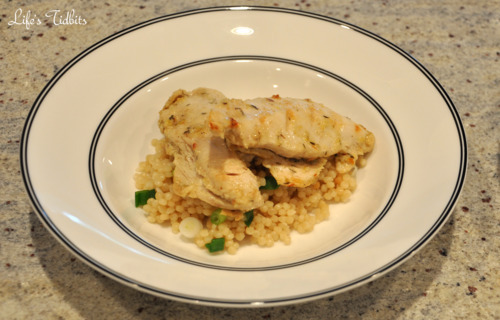
I really like watching the Food Network cooking shows.  One of the chefs I really like is Anne Burrell.  She make some great recipes, but also I just love her level on energy on the show.  In any event, a while a go I watched the show where she makes garlic chicken with Israeli couscous.  Last night I was craving Israeli couscous so I looked up Chef Burrell’s recipe for inspiration.  Israeli couscous is more fluffy and pasta like than “regular” couscous.  If you’ve never had it before it’s definitely worth a try.

After figuring out what I had in the house I decided to make a simpler version of the recipe while trying to get the same type of flavors in my chicken breasts.  I am happy with how it came out and will be adding this recipe to the dinner rotation.

Garlic Chicken Ingredients:

~ 1 lb Chicken Breasts
1 whole garlic bulb
1/2 lemon, zested and juiced
1/4 tsp thyme
1/2 tsp ground cumin seeds
Pinch crushed red pepper flakes
Kosher salt
Extra-virgin olive oil

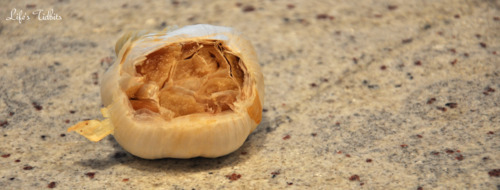
Preheat the oven to 350 degrees F. Put the garlic bulb straight on the oven rack and roast it is soft when squeezed, about 30 minutes. Remove them from the oven and let cool.

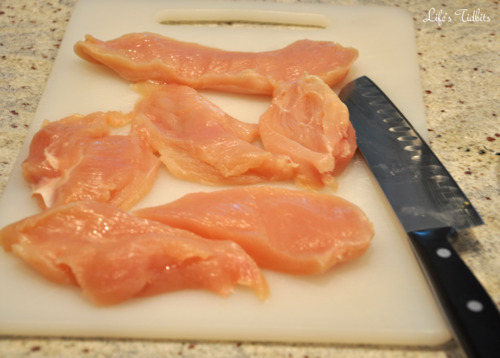
While garlic is roasting, prep the chicken by removing any fat and cutting into large chunks (about 6).

In a bowl combine the lemon zest, juice, thyme, cumin, red pepper flakes and salt then set aside.

When the garlic bulbs are cool, slice the tops off.

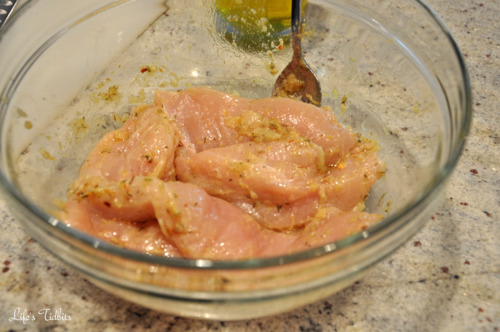
Squeeze out the roasted garlic into the bowl.  Add a little olive oil and mash the mixture into a loose paste. Combine with the chicken pieces and let sit for at least 1 hour.

Once the chicken has marinated grill, bake or stove top cook it.

Couscous Ingredients: 

1 cup of Israeli Couscous
1 and 1/4 cups of Chicken Broth
2 Scallions/Green Onions

Bring a chicken broth to a boil over.  Add the couscous, reduce to a simmer and cover for about 8-10 minutes.  watch the couscous closely as sometimes the water boils out too quickly.  You can also completely shut the heat off and cover it.

Cut all of the green onion into thin slices.  Once the couscous is cooked mix in the green onions.

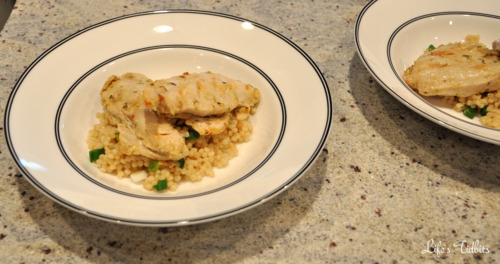
I like to serve it in shallow bowl. Add the couscous/onion mixture and then place the cooked chicken on top.  This recipe makes 3-4 servings.

Looks so pretty and it’s yummy too!

Happy Cooking!

Don’t forget to leave your tidbit by commenting and/or add Life’s Tidbits to your RSS Reader :)

Share

I don’t know why, but back in February I became slightly obsessed with making red velvet cupcakes.  I wanted to make them for my 30th birthday, however my husband told me cooking for my own birthday celebration was a no-no! :)  Little did I know he had already purchased my favorite cake vanilla on vanilla.  Plain Jane over here, but I do spice things up from time to time.

I’ve heard a ton of stories about red velvet cupcakes ending up too dry so I was weary of picking a recipe to follow.  I ended up referencing the follow recipes which can be found here (primarily used), here and here.

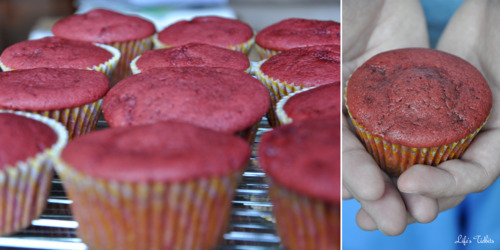
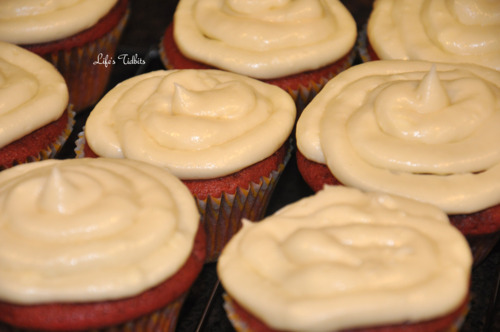
For my first try at these somewhat finicky cupcakes they turned out great! My husband tried the batter and loved it. Then talked about how great the house smelt the whole time they cooked.  He’s my designated frosting checker and gave the A-OK on that little number as well.  In the end the final cream cheese frosting on a red velvet cupcake was a success in our house tonight!

What you will need for the cupcakes:

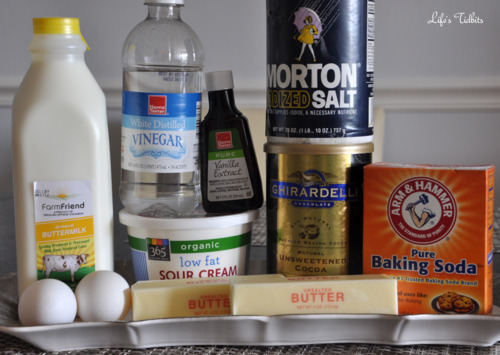
  • 1 cup (2 sticks) unsalted butter, softened
  • 1 1/2 cups sugar
  • 2 eggs
  • 1/4 cup (2 oz) red food coloring
  • 1/4 cup unsweetened cocoa powder
  • 2 1/2 cups all-purpose flour
  • 1 tsp salt
  • 1 tsp baking soda
  • 2 tsp vanilla
  • 1 cup buttermilk
  • 1/2 cup sour cream
  • 1 Tbsp white vinegar

NOTE:  3 tbsp of coco powder is equal to about 1/4 cup – in case you are referencing other recipes like I did.

Preheat oven to 350. Line muffin tin with baking liners.

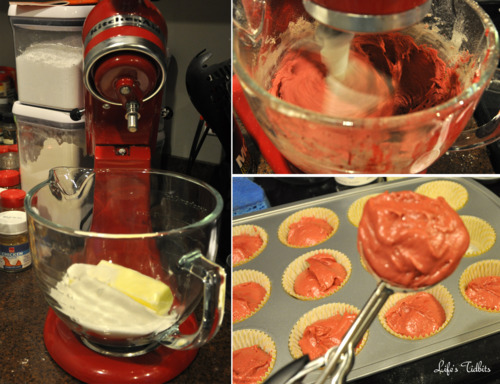
Cream butter and sugar on medium-high for two minutes. Mix in one egg at a time, beating after each addition.

Combine food coloring and cocoa powder to bowl. Watch out for your clothes! I got food coloring all over one of my favorite shirts … pout!  Turn the mixer to low and add to the butter/sugar/egg mixture until just incorporated and then beat on medium for 4 minutes.

Sift together the flours, salt, and baking soda and set aside. Stir buttermilk and vanilla together.

Add dry ingredients to the bowl in three batches, alternately with the buttermilk in two batches, starting and ending with the dry ingredients. Beat on medium until just combined.

Add sour cream and vinegar and beat on low until combined.

Fill muffin cups 3/4 full and bake for 20-30 minutes.  Check the cupcakes at about 15 minutes with a toothpick to see how they are coming along.  Let cool on a wire rack or in the pan.

While the cupcakes are cooking or cooling make your frosting.

What’s needed for the frosting:

  • 16 oz cream cheese, softened
  • 10 Tbsp butter, softened
  • 2 tsp vanilla
  • 3 cups powdered sugar, sifted

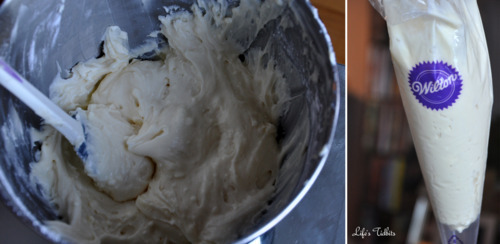
Combine the cream cream cheese, butter, and vanilla in the mixer at med speed.  Add the powdered sugar to the bowl in small batches, while beating on low.  Be careful not to add too much or it was dust you and the counters with sugar as it combines. :) Once fully combined beat on high until desired consistency is reached.

For a stiffer icing, add more powdered sugar.  If needed add a little milk to make the icing softer (you shouldn’t need to do this).

Put your icing into an icing bag and cut off the tip of the bag.

Apply the icing in circles from the outside in.  You should have some frosting left over.  It’s a little too much frosting for 24 cupcakes.

Happy Cooking!

Do you have any tips on making red velvet cupcakes?

Don’t forget to leave your tidbit by commenting below :)

Related Posts Plugin for WordPress, Blogger...
Share