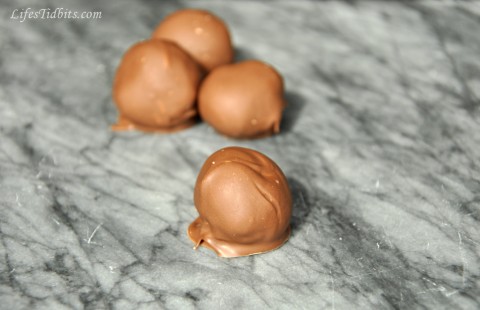
I’ve recently become somewhat obsessed with making truffles. Right before Easter my friend came over to hang out and was interested in learning how to make truffles.  I had been dying to try out this new truffle recipe and decided it was the perfect time.  I told her we had to document the process as this was a recipe I had been planning to blog about.  So …. we collected all the ingredients, got the camera ready and the truffle making began!

Although I do really enjoy cooking by myself, having someone to chit chat with and lend that extra hand makes the process that much more fun!  I’ve been trying to think of a clever/fun name for these truffles, but haven’t come up with anything good yet.  I was considering PB&R, but that reminded me too much of the beer PBR … pout.  Any good name suggestions out there?

If you decide to go for the larger portion of peanut butter these truffles kind of become a fancier and more decedent version of Reese’s Peanut Butter cups with a hint of Raspberry.  Either way the feedback on this little dessert was very positive so it will definitely be staying in the make again (and again hahaha) pile of recipes.

Here we go … it’s truffle yummilious time!!

Raspberry Peanut Butter Truffles Recipe | Life's Tidbits

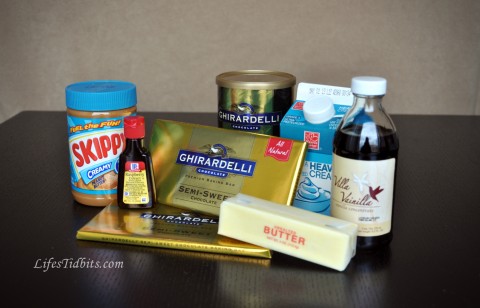
Ingredients
10 oz semisweet chocolate
1/2 cup heavy cream
2 tablespoon unsalted butter
1/2 teaspoon vanilla extract
1/2 teaspoon raspberry extract
1/4 cup peanut butter (if you are peanut butter LOVER do 1/2 a cup)
10 oz of chocolate for coating like melting chocolate

Raspberry Peanut Butter Truffles Recipe | Life's Tidbits

Directions
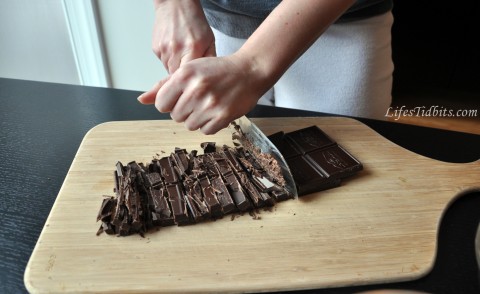
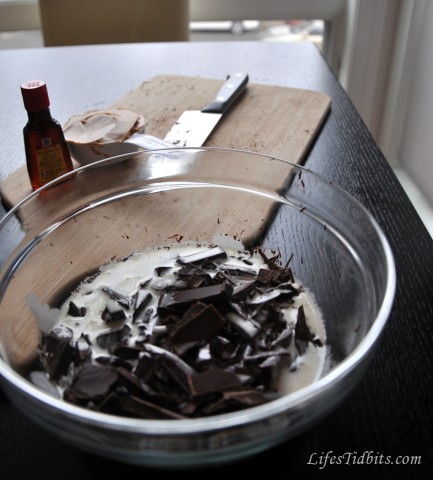
Chop the chocolate and put in a heatproof bowl.

Raspberry Peanut Butter Truffles Recipe | Life's Tidbits

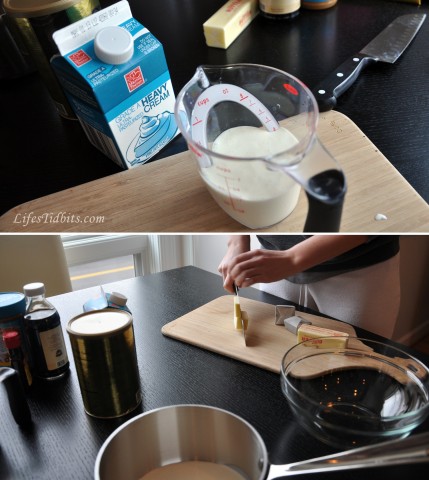
Bring the heavy cream and butter to a simmer in a saucepan over medium heat.

Raspberry Peanut Butter Truffles Recipe | Life's Tidbits

Pour cream/butter mixture over the chocolate and let sit until melted, about 10 minutes. Stir with a rubber spatula or whisk until smooth. (If necessary, microwave in 20-second intervals until the chocolate melts.)

Raspberry Peanut Butter Truffles Recipe | Life's Tidbits

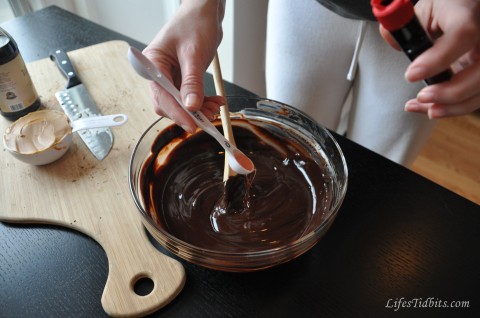
Stir in the vanilla and raspberry extracts.

Raspberry Peanut Butter Truffles Recipe | Life's Tidbits

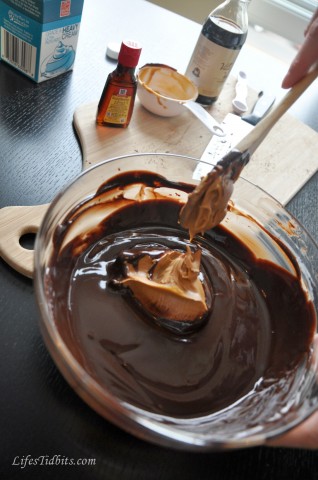
Then stir in the peanut butter. Stir until the ganache is smooth and shiny.

Raspberry Peanut Butter Truffles Recipe | Life's Tidbits

Pour into a shallow baking dish (or leave in the glass bowl as I did) and refrigerate until firm, 1-2 hours or overnight.

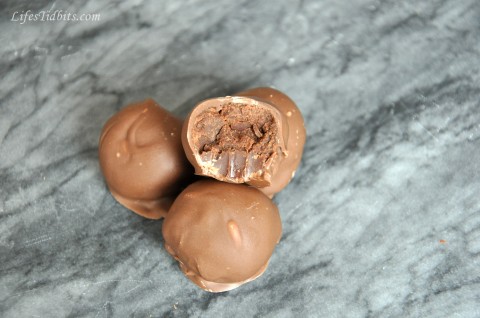
Roll tablespoonfuls of the ganache into 24 balls, then return to the refrigerator for at least an hour.  Heat your melting chocolate in a double broiler or in a chocolate melting pot.  Drop each truffle into the melted chocolate and cover completely.  Transfer to a parchment-lined baking sheet.  Place in the refrigerate until firm.  Store is airtight container until ready to serve.  I like to let them sit at room temperature for 20 minutes before serving to ensure the center is nice and gooey!!

Raspberry Peanut Butter Truffles Recipe | Life's Tidbits

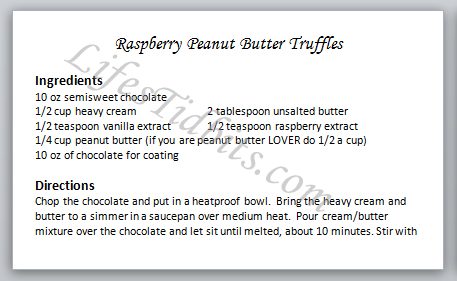
I hope you like this new tidbit!!! I’ve created an easy print recipe card for this recipe.

Raspberry Peanut Butter Truffles Recipe | Life's Tidbits

Click here for a 3×5 index card recipe card.

Recipe adapted from Food Network Magazine.

Happy Cooking!

If you enjoyed this post, please add your tidbit by commenting below.  Don’t forget you can follow us on PinterestInstagramFacebook and Twitter.

Share

I was rereading the about page for Life’s Tidbits the other day and started thinking about ways to share more random tidbits.  Specifically I was focused on “life is a compilation of the small things, tidbits…”.  So here goes nothing.  Below is a collection of some very random tidbits from the past week or so …

1 – I’ve taken butter out of the refrigerator to soften three days in a row and end up putting it back.  I keep meaning/wanting to make sugar cookies, however I think it’s best for my waist line if I don’t have 2 dozen cookies laying around for me to eat … I mean the last time I had them around I started eating them for breakfast on a Friday! Truth!!

2 – Texts You Don’t Want To Get From Your Parent – #5 is pretty darn funny!  #7 is fabulous.  #8 goes out to my sister … :) and omg please don’t miss #12 … scratch that read them ALL!!  90% of these made me LOL … I am laughing so hard that the dog is confused and is barking at me.

3 – I have been battling a case of writers block over the last couple of weeks.  I feel like I’m finally coming out of it, but blogger writing block is a first for me.  I found it really frustrating that the words just weren’t coming to me.

4 – Revenge has become one of my favorite TV shows and I don’t really know anyone else who watches it.  Literally I’ve been trying to recruit people to watch it for a few months now so I can chat about it with someone.  I managed to get my sister all sucked into the show, but haven’t been successful with anyone else.  Do YOU watch Revenge?  … oh my I think I’ve taken to recruiting via blog posts (hang head in shame)!

5 – I think my new recipe for March is going to be a Chocolate Peanut Butter and Raspberry Truffle.  I wanted to call it PB&R, but that kind of reminds me of the beer PBR instead of of the PB&J sandwich I was going for.  Any suggestion for a cute name for my new truffle?

6 – Lightroom is my new favorite photo editing software thanks to my friend Sara.  Don’t get me wrong I am certainly not ready to part ways with PhotoShop, however Lightroom makes editing photos super fun and easy.

7 – Lofty goals of getting back into running came to a screeching halt after just one run.  In just a few short weeks there will be no more “it’s just so cold outside” excuses …  hopefully the spring weather will help my running motivation levels!

8 – One of my oldest friends is coming to visit me next week!!! She did this horrible thing about a year ago and move all the way to the west coast.  It just isn’t the same without her in DC.  I am super excited to spend some quality time with her next week.

9 – When I learned that Google Reader was “closing its doors” (so to speak) on July 1st I kind of freaked out.  Google Reader has been like an iv for reading blogs, new and trashy celebrity gossip.  I use the mobile app as well as the bower based version more than once a day.  Not to worry I found a replacement I do believe (… more to come).  Were you as upset as I was to learn Google Reader will be no more?

10 – This post has zero pictures. I wonder if anyone is going to read it … I mean everyone likes a little eye candy.  Maybe I should add some pictures in next week … thoughts?

BONUS TIDBIT – Once tomorrow’s blog post goes live I will have blogged 4 (YES FOUR!) times this week.  I think that’s a new record.  I’m pretty stoked. =)

What random tidbit do you have to add this week?

If you enjoyed this post, please add your tidbit by commenting below.  Don’t forget you can follow us on PinterestInstagramFacebook and Twitter.

Share

More often than not I am rushing around the house in the morning getting ready for work.  The morning routine includes all the normal things one normally does plus walking the dog and making lunches for me and the hubby.  Despite being in the kitchen doing the lunches I often forget to take meat out of the freezer and put it in the refrigerator.  Does that ever happen to you?  Forget to take the chicken, beef, pork or fish out of the freezer to properly prepare for dinner that evening?  Since I make this mistake often I will sometimes go to the store on the way home from work and purchase what I need.  Other times I get home and slap the meat on the counter and pray it defrosts quickly so I won’t have to nuke it.  For some reason defrosting in the microwave seems to always “pre”cook the meat, which I don’t find appealing.

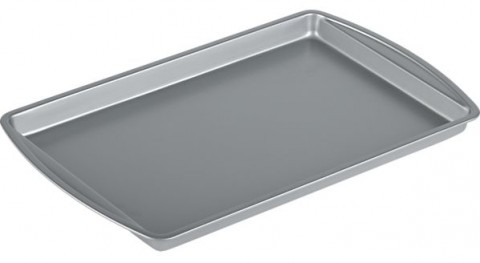
Recently my mother-in-law taught me a great tip for defrosting meat quickly …. place the meat on a metal cookie sheet.

Source

I’m not really sure why this works, but it does so I’m not going to fight it!  Next time you forget to take dinner out of the freezer in the morning to thaw go ahead and slap it on a metal sheet pan.  Wait a little while and flip the meat.  The quick defrosting time will definitely not disappoint.  What’s your tip for defrosting meat quickly?

Happy Cooking!

If you enjoyed this post, please add your tidbit by commenting below.  Don’t forget you can follow us on Pinterest, Instagram, Facebook and Twitter.

Share

After getting the DIY baby shower invites out the next thing to tackle was the menu and the decorations.  The mom-to-be and I have always joked that she is never lacking black and white outfits.  I figured a black and white color scheme would be perfect and wouldn’t you know it my friend wore a black and white outfit to her shower without even knowing the color scheme!!!  I guess I know my friend pretty well. =)

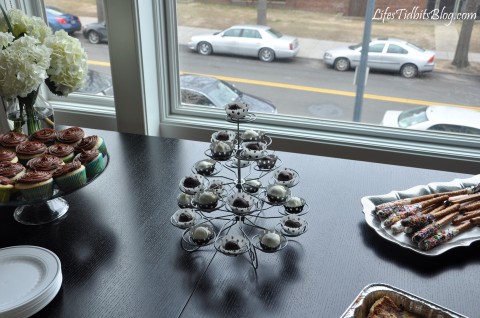
The brunch menu came together quickly.  Although there was definitely too many sweets in the end with a good amount of left over, but who doesn’t like left over Oreo truffles?!?!  I was pretty pleased with the variety of options for the brunch.  Everyone came hungry so there wasn’t a crazy amount of left overs.

Little Man Brunch menu included:

  • Egg Soufflé
  • Pumpkin Bread
  • Fruit Platter
  • Cheese Plate
  • French Toast Casserole
  • Turkey Meatballs in red sauce
  • Oreo Truffles
  • Cigars (aka chocolate covered pretzels)
  • Yellow Cupcakes with Chocolate Buttercream Frosting

We kept the party decorations pretty simple.  A bunch of black and white balloons, two flower vases, onesies and then a few little mustache details to bring everything together.

Unless otherwise noted all pictures were taken by Sara from Photos from the Harty.

Initially I bought some 3-6 month onsies and quickly realized they are SO tiny the iron-ons wouldn’t look so great on them.  I used one 3-6 month onsie for the bow tie (middle) the other two are 12 month onsies.

To supplement the balloons, onsies and mustache details there were two hydrangea flower arrangements.  I feel like I somehow involuntarily collect vases so it was easy to find two that were pretty much the same.  Put some white and black decorative stones in the bottom, add water and the flowers … voila a “DIY” center pieces!

The paper straws and mustache cups were a big hit.  These were probably my favorite detail.  I’ve become slightly obsessed with the paper straws.  There were purple barbershop straws at our wedding and yellow ones for the husband’s 30th birthday party.  The truth is I might never throw another party without them hahaha.  Seriously all parties will have barbershop straws!

We played two shower games.  The first was “How big is mommy’s tummy?”.  I look awfully serious measuring how many toilet paper squares Rebecca’s belly is.  I love the picture to the right as she counts the square … all smiles!!!

Next up was the poppy diaper game.  I was surprised at how stumped everyone was trying to figure out what type of candy bars were in the diapers.  The hardest one was the dark chocolate milky way … apparently the dark chocolate really threw everyone off.  And let me just say that the butterfinger game me a run for my money.  That candy bar was HARD to melt!

Thanks to all the beautiful ladies who came to shower the mom-to-be and her little man!

I put the party favors (with the DIY tags) on a platter and placed them by the front door.  I had to remind people to take them as I didn’t want 14 lollipops for myself!  I think they were a big hit and displaying them during the party added to the decorations.

A big thank you to Sara from Photos from the Harty for taking pictures at party!!

Thanks for combing on over for this Little Man baby shower.  What’s your favorite detail?

Happy Party Planning!

If you like this post, please add your tidbit by commenting below and/or add Life’s Tidbits to your RSS Reader :)

Share

With chocolate mustaches as the baby shower favor completed all I needed was to make the favor tags.  I ordered card stock to print the tags on and started designing them in PhotoShop.  I wanted the design of the tags to be similar to the custom invitations I made so the “paper products” would mesh.

Here’s the final product:

After cutting all the tags down to size using my favorite paper cutter I compiled everything I needed on the kitchen table.

With scissors I cut a small slit in the upper left corner of the tags and threaded the ribbon through.  The the husband got to play assistant and hold the favor bags as I tied the ribbon/tag on each mustache lollipop.

Here’s the final product!

The husband and I thought it would be fun to try out one of the extra mustaches on Sophi.  She was desperately trying to lick the chocolate while we photographed her.  Doesn’t she just look adorbs with her ‘stache?!?!

What do you think of the DIY party favor tags?  Stay tuned … more Little Man baby shower details coming up soon!

Happy Party Planning!!

If you enjoyed this post, please add your tidbit by commenting below.  Please follow Life’s Tidbits on Facebook and/or Twitter.

Related Posts Plugin for WordPress, Blogger...
Share