During the wedding planning process I started reading a lot of blogs.  Sooooo many brides were doing DIY projects.  The wedding blogs really got my planning/artistic juices flowing.  I would read about how simple it is to make X all on your own and immediately I would want to take on the DIY project.  I would gently remind myself I am not the artist in the family, that would be my sister, the MOH.

My friend from work was kind enough to share A LOT and I really mean A LOT of her wedding/party planning expertise with me.  One of her suggestions was to check out her friend’s blog called Aisle with Style.  As I was browsing the posts I found a post for the wedding invitations my friend had done for her brother’s wedding.  When I stumbled upon the blog post I instantly wanted to make my own invitations.  I emailed my friend and asked her for the details on the invitations she made for her sister-in-law’s wedding.  Then I forwarded the post to my then fiance and mother.

Both liked the invitations; however neither was excited about the DIY part.  My husband was very concerned about hidden costs of DIY as well as the time it would take us to do the invites.  I started pricing out invitations online.  The non diy invitations would still cost a pretty penny even from the online vendors I found.  While visiting my parents for Thanksgiving we spent sometime doing wedding stuff.  Sunday we went with my mom to register at Bloomingdale’s.  There just happen to be a paper/invitation store in the same complex so we stopped in to check out the invitation designs as well as pricing.  As I had assured both my mother and husband the invitations were expensive! Both were finally, mostly, on board with a little (or a lot as the case maybe be) DIY action.

After purchasing the paper and the pretty purple envelopes.  I could barely contain my excitement.  There was only one issue, I had a super old version of PhotoShop and it wasn’t compatible with a lot of the new functionality.  My husband to the rescue!  He quickly jumped onto his computer and downloaded a 30 day trial version of the newest PhotoShop version.  And then the fun began. YAY!

I spent many hours camped out on the couch, watching tv and and cutting our invitations and insert cards down to size.  Below is a little picture of how I totally took over the coffee table to create our invitations.

In the end we had three pieces to our wedding invitations – the invitations, room block insert card and rsvp post card insert.

After completing all the invitation the next step was to do the envelopes.  Check out our DIY invitation calligraphy here.  We also made custom stamps for our wedding invitations, which you can see here.

My tips for a successfully DIY invitation:

1)  Buy a paper cutter.  A good paper cutter is essential for straight lines and a sharp blade is ideal so the edges don’t fray.

2)  Make one complete invitation before printing 100 copies.  When I made my inserts I didn’t put it all together until I had printed multiple copies. I think realized the Room Block and RSVP text was way to big and had to reprint.  Waste of paper and time.

3)  Print High resolution.  I printed the 1st few on standard.  They looked nice, but when the husband took over the printing press he printed on High (he had no idea what setting I had used) the colors popped more and so we had to re-print the ones I had initially printed.

4)  Buy extra paper.  I suggest printing on regular white paper for a while until you think it is right.  See #2 and #3 I needed extra paper because of small modifications and printer settings.

5)  Start early.  Everyone laughed when I started my invitations 8 months out. But I wasn’t motivated some days or just plain didn’t have time.  Giving myself a lot of time to complete the project reduced my stress level and made it more fun.

Happy DIY!

Don’t forget to leave your tidbit by commenting and/or add Life’s Tidbits to your RSS Reader :)

Share

While doing “married things” {phrase coined by the husband} we ended up at The Container Store.  Clearly this is one of those places like Target or Bed Bath and Beyond, where I find things I never knew I needed but while we are there I think I really do NEED them.  I mean there is no reason we should have spent 1+ hours at The Container Store when it was sunny and 80 plus degrees outside.  But anyways, while walking up and down each aisle we ended up with quite the large cart of stuff we “needed”.

One of the many items in our cart was elfa kitchen storage.  Our condo is the first place I’ve lived where I haven’t had to use cabinets to store food.  The pantry is great and has really come in handy for storing items not eatable as well like batteries, lunch boxes, cook books and dish towels.  As a result our pantry has been pretty much over full since moving in.  We were hoping the elfa storage would expand the pantry a little bit.

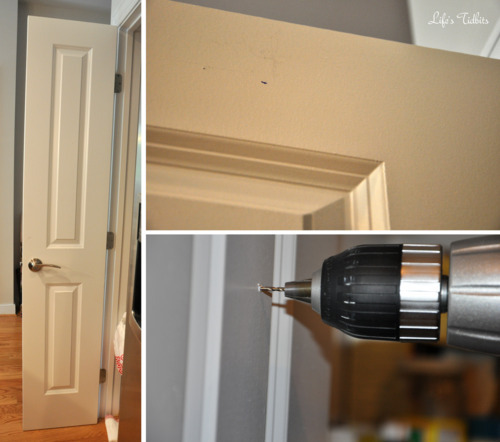
Installation was very easy.  Hold the long rod up to the back of the door and mark the places where the screws go.  We went ahead and drilled the holes a little to get it started and make the screw go in easier.

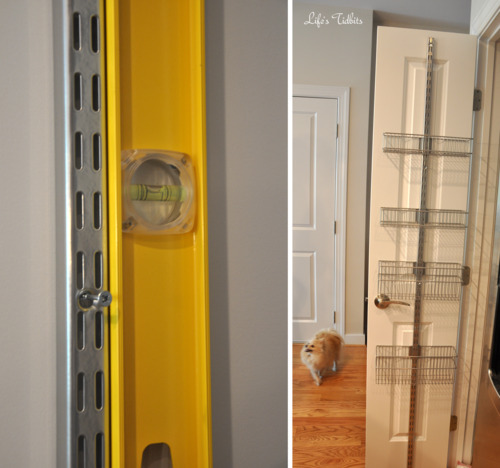
We held up the rod and put two screws into the door to hold the rod in place.  Before fulling anchoring it to the door we ensured it was level.  It was so we put all the screws securely into the door, clipped on the baskets and we were done.  The great part about the baskets are they come in standard and narrow.  We purchased the narrow baskets to ensure they wouldn’t hit the shelving in the pantry.

Initially we purchased 4 baskets.  We were pleased to see there was plenty of room for 2-3 more baskets.  Back to the container store we went and purchased two additional baskets.  We are loving the new storage and the way the baskets help with organization!!

What do you think of our new expanded pantry?

Happy home improvements!

Don’t forget to leave your tidbit by commenting and/or add Life’s Tidbits to your RSS Reader :)

Share

Long before we moved into our new place, let alone closed on the condo, my husband was furiously searching for a wall mount for the tv.  He had a number of requires, but at the top of the list the mount had an arm that would allow the tv to swing out.  This would enable us to watch tv while cooking in the kitchen.  Thank goodness for our open floor plan or the swing out arm would have been a moot point.

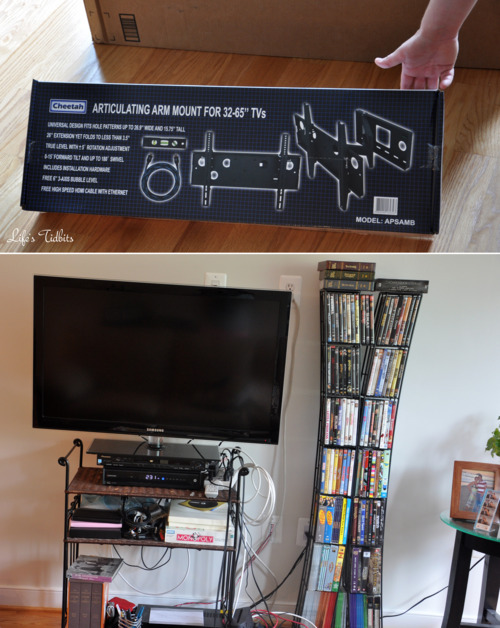
Being the sweet man that my husband is, I was consulted numerous times on which mount I liked the best.  I really didn’t care and told him to choose and purchase whatever he thought was best.  After much search and deliberation he decided on a Cheetah Wall Mount.  Two days later the mount arrived … yay for Amazon Prime’s two day shipping.

Above is our before picture.  The tv stand was purchased from Pier 1 Imports and the dvd rack from Best Buy back when I was in college. I would say they’ve both seen better days and it is about time we replace them.  Installing the tv wall mount was the perfect first step.

First step was to find two studs.  Luckily we are in possession of a stud finder.  We marked where the center of the studs were and then we measured and drill four holes for the screws.  The wall mount is A LOT heavier than we imagined it would be.  The husband held up the wall mount while I screwed in the washer with the screw.

Then we went ahead and screwed the arms onto the back of the tv and hung it. The cool part about the wall mount is it has a built in level “bubble”.

After a few tweaks it was leveled and hanging on the wall!  We also took the plunge and invested in a new tv stand to use with our new fancy wall mounted tv.  The living room is finally coming together … so exciting!

To celebrate our newly mounted tv we cooked dinner and rented a movie on demand. :)

Happy home improvements!

Don’t forget to leave your tidbit by commenting and/or add Life’s Tidbits to your RSS Reader :)

Share

I have already told you about painting a red accent wall in our bedroom.  There were a few pieces of trim to fix, but all in all the accent wall in the bedroom is complete.  Because we had painted some sample paints on two of the three other walls in the room we had to paint the three other walls so they would all be the same color.  Why we didn’t put all samples on one wall to start is beyond me. It would have saved us some serious time to have left those walls as is.  There was builders grade paint already on the walls so we considered doing touch ups to the walls instead of picking a brand new color.  When we went to the Duron store to buy the paint and they told us that color/style only comes in a 5 gallon bucket. That was WAY too much paint and the cost wasn’t so pretty.  Back to the drawing board we went.

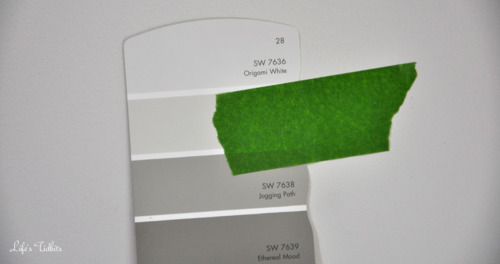
While searching for a shade of gray for the living room I had picked up a Sherwin Williams color wheel.  We decided it was as good a place as any to start the search for a white/cream color for the bedroom.  Quickly we realized Origami White (7636) was very similar to the color already on the wall.  It was slightly lighter and had more gray/brown tones and less yellow in it.  We taped the swatch up on the wall for a few days to make sure we liked it.

As the designated paint runner I was off to Sherwin Williams to pick up the paint once we decided to go with Origami White.  I was concerned one gallon wouldn’t be enough paint for the three wall and inside of the closet and the husband was convinced 1 gallon was plenty.  He could tell it was making me nervous so we agreed on buying a gallon and a quart.  This way we had a quart of paint as back up for the closets OR if we mark up the walls while moving in.

I purchased the paint in satin, which is pretty much the same finish as eggshell.  After my last mix up with paint finish I looked up satin vs. eggshell before allowing the SW employee to place my order.  It took me about two hours to paint the edges and three walls in the bedroom. I also managed to put about 3-4 spots on the ceiling when using the roller extension.  Oopsies!

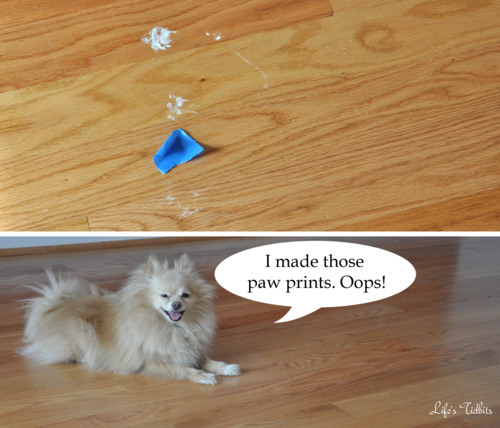
But that wasn’t the only oops that happened while painting the bedroom.  Sophi backed onto the lid of a paint can while trying to rescue her ball from the plastic wrap.  Before I could grab her she promptly ran onto the small patch of hardwood floor that wasn’t covered in plastic.  So we had three little white paw prints on the floor to deal with.

Luckily after allowing the paint to dry on the floor we were able to scratch it off with finger nails.  Looked like nothing had ever happened.  As I pulled off all the tape and threw the plastic on the floor away I started to realize our bedroom was 95% completed!  I grabbed the can of ceiling paint and touched up the couple of spots I had inadvertently painted.  Then I screwed the light switch and outlet plates back on and what do you know it looked like a real room again!!

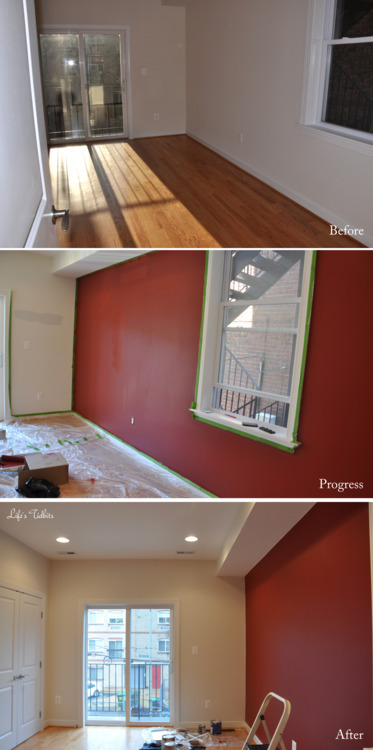
Here’s the before, during and after:

Although I would like to call the bedroom a wrap we still have a few things left to do.

1.  Remove existing closet shelf/poll, putty/paint sed closet and then install the new closet organizers

2.  Decided upon, purchase and install blinds.

At this point we are 4 days away from move in. I am not convinced we are going to be able to get all that completed before we move in.  Our currently place is only 1/2 packed and the movers arrive Saturday morning at 8am.  We better get a packin’ don’t you think?!?!?!  We are hoping to at least complete demolition on the closets so the dust doesn’t get all over our furniture.  Cross your fingers for us!!

Don’t forget to leave your tidbit by commenting below :)

Share

Chugga chugga Chugga chugga CHOOO CHOOOO!!!! Sorry couldn’t help myself LOL. :)

My initial plan for the bedroom was to have a dark gray accent wall with light gray side walls. I really liked the mock up I did and so did our friends and family.  We went to Home Depot and purchased a few different samples of Glidden paint.  All I can say is paint color looks WAY different on the walls than it does on the sample card or online.

Here is the room mock up I created using Glidden’s website to paint the walls and then I used PhotoShop-ed in add the bedding and my photo from Mexico:

The silver dust color on the side walls turned out to look super purple in the room.  The Seal Gray was pretty, but just not what I was looking for.  I’m not sure what the lighter gray/silver color is on the wall (in the picture below), because the husband chose it at random and we have since thrown the paint card and sample away.  Sorry for the horrible picture. This is what I get for using my old crappy camera.

Feeling discouraged that my gray accent wall wasn’t turning out as I had hoped a friend offered to help us narrow down color choices.  We got a gray duvet cover for our wedding and considering it is the ONLY duvet cover we have agreed upon in 2 years we weren’t willing to part with it.  Therefore the bedroom color had to compliment gray. Lucky for us gray is pretty neutral! Our friend suggested we do a red wall instead of the gray. I was sold on the idea pretty quickly.

The husband and I had been considering red as our accent color in the living/dining room after finding this Pottery Barn rug.  Luckily my husband has purchased a rug sample so it was easy to find a red paint swatch that closely matched the rug, BM Confederate Red (2090-20).  During one of my many trips to the paint store I purchased a sample of this paint.  It looked nice on the wall, but felt like it had too many pink undertones.  I remember my mother had said her friend had recently done a red accent wall in her living room and decided to ask my mom to ask her friend for the paint color.  Enter HOT TAMALE! It’s a C2 paint, which is suppose to be thick enough to only have to do one coat of paint.

Anyways we slapped C052, aka hot tamale, paint sample up on the wall and we had a winner!  Since the red rug didn’t match the red paint we decided to say goodbye to rug.  We are now thinking a gray rug with red accents around the room to tie everything together.  Hopefully it turns out well!

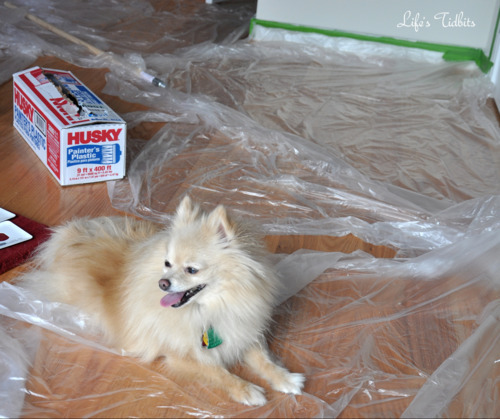
With the walls taped and the floors covered I was ready to begin painting.  Sophi supervised the whole thing. :)

I’m proud to say I pretty much painted this whole wall myself.  One thing I quickly learned while painting the red wall was to do the trim first.  Painting the trim first with a brush and then going over it (or close to it) with the roller made it blend better. When I rolled and then did the trip the brush strokes stood out more.

Although C2 paint is supposed to only need one coat we decided to do two. As it was my first time really painting as well as wanting it to look perfect the second coat made a world of difference.  I was very methodical about the second coat too and started at the left and worked my way right instead of starting in the middle as I did with the first coat.

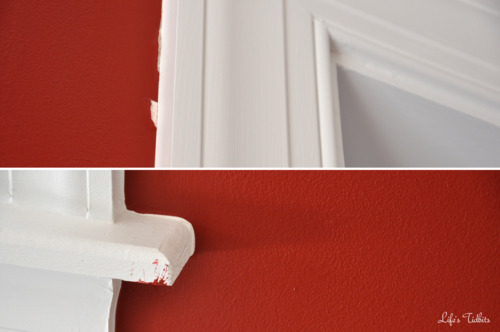
When I removed the tape I noticed the window frame had some red on it … oops. I also noticed the tape pulled up a few small pieces of the paint around the edges.

Luckily my husband has a steady hand and went ahead and touched up the places where the paint lifted from the wall.  Now all I need to do is touch up the window frame.  Two mistakes, not too bad if I do say so myself.

Here’s the before and after of our red hot tamale wall:

I can’t wait to paint the other three walls a creamy white and then we can call the master bedroom a wrap on the painting front.  I’m on the hunt for some nice little red accents to put in the room.

What do you think of our red wall?

Happy painting!

Don’t forget to leave your tidbit by commenting below :)

Related Posts Plugin for WordPress, Blogger...
Share