I’m a little bit behind in posting gift ideas given there are only 7 days until Christmas and let’s face it Hanukkah was almost a month ago!!  However it might come in handy for any of you last minute gift buyers out there (like my hubby)!!  Heck this year I have to put myself in the last minute present buyer category.  If you are already done with holiday shopping these items would make for pretty good Valentine’s Day gifts as well.   Best part is these gift ideas won’t break the bank!  With a baby on the way, we decided to keep the gift giving/spending to a minimum this year.  Being on (more) of a budget this year has enabled me to find ideas I might have overlooked in the past.  I would certainly be excited to receive any of these items …

Gift ideas under $50  | Life's Tidbits

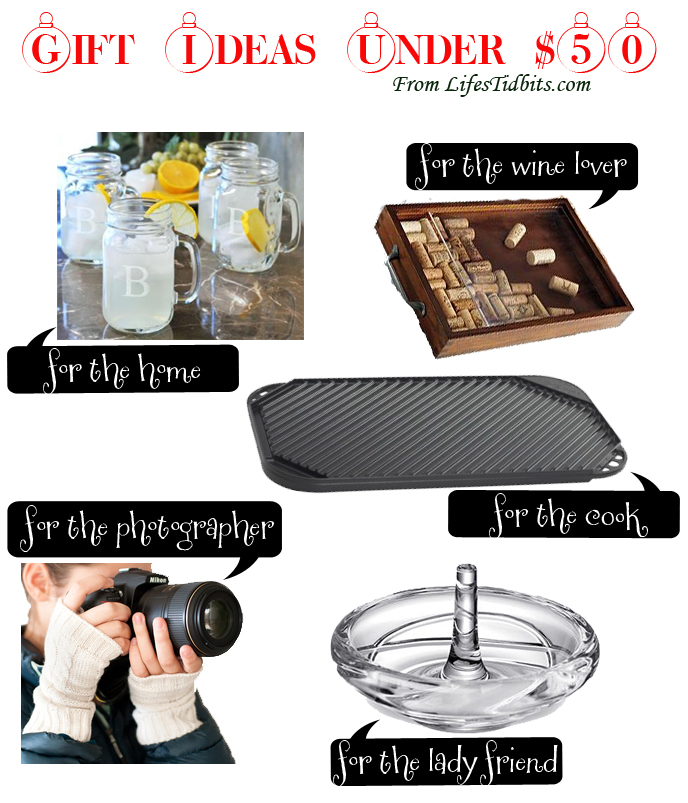
For the Wine Lover – wine cork collecting kit
For the Lady Friend – Lenox Adorn Ring Holder
For the Home – Monogram Drinking Jars – Set of 4
For the Photographer – Fingerless Shooting Gloves
For the Cook – Nordic Ware Reversible Griddle

What gift would you love to receive that’s under $50?

If you enjoyed this post, please add your tidbit by commenting below.  Don’t forget you can follow us on PinterestInstagramFacebook and Twitter.

Share

ThankfulThursday_Thanksgiving

A couple of blogs I follow do weekly or monthly Thankful Thursday posts, but when November hit the number of bloggers giving thanks increased significantly.  With Thanksgiving only a week away I decided it was time to jump on the thankful train as there is a lot I have to be thankful for this year.  So here goes nothing …

I am thankful for (in no particular order):

(5)  my family and friends.  This is pretty much a given, right?  I would crazy not to be thankful for the amazing people in my life.  They truly make the good times better and the bad times bearable.  Love you guys/gals!! xoxoxo

(4)  my job.  During and after the furlough I quickly came to the realization the impact not having a job would have on me, as well as my family.  There is of course the financial side, but having a job gives me purpose and something to “do” each day.  I didn’t think I was the type of person who needed something to “do”, but apparently I DO!

(3) the patience and support of my husband.  The hubby honestly deserves a metal for the level of patience and support he brings to the table.  While he has always been that way I think he put his game face on when we got pregnant.  Though it is obviously very exciting it can also be stressful and scary; yet he seems to take it (and all my fun emotions that go along with pregnancy) all in stride.   I’m very lucky to have a husband who is so incredibly patient and supportive!

(2)  my parents and sister coming to DC for Thanksgiving since I can’t travel to MA.  Thanksgiving is by far my most favorite holiday and this year will be the first time I’m not in Massachusetts celebrating.  We ALWAYS do Thanksgiving at my parents house and then Thanksgiving “round 2” on Friday or Saturday with my great aunt and a whole bunch of the cousins.  The weekend is kind of like an eating marathon!  They are all changing their schedules/traditions to be with the hubby and I this holiday.  While this year won’t be exactly what any of us are use to the most important thing is we are together and I am thankful they are willing to make the trip!

(1)  being pregnant.  It is such a blessing to be able to be pregnant.  I complain too often about pregnancy symptoms like aches, pains, being tired and gaining weight.  It’s easy to sometimes take for granted what an amazing miracle it is to carry my little one!!  Have you seen the maternity shirts that say “I’m growing a human.  What’s your super power?” … love it!

While there are way more things I am thankful for these couple items do top the chart for this year.  Only one more week until my favorite holiday of the year … bring it on Thanksgiving!!!

What are you thankful for (this week, year or even just today!)?

If you enjoyed this post, please add your tidbit by commenting below.  Don’t forget you can follow us on PinterestInstagramFacebook and Twitter.

Share

I’ve recently become somewhat obsessed with making truffles. Right before Easter my friend came over to hang out and was interested in learning how to make truffles.  I had been dying to try out this new truffle recipe and decided it was the perfect time.  I told her we had to document the process as this was a recipe I had been planning to blog about.  So …. we collected all the ingredients, got the camera ready and the truffle making began!

Although I do really enjoy cooking by myself, having someone to chit chat with and lend that extra hand makes the process that much more fun!  I’ve been trying to think of a clever/fun name for these truffles, but haven’t come up with anything good yet.  I was considering PB&R, but that reminded me too much of the beer PBR … pout.  Any good name suggestions out there?

If you decide to go for the larger portion of peanut butter these truffles kind of become a fancier and more decedent version of Reese’s Peanut Butter cups with a hint of Raspberry.  Either way the feedback on this little dessert was very positive so it will definitely be staying in the make again (and again hahaha) pile of recipes.

Here we go … it’s truffle yummilious time!!

Raspberry Peanut Butter Truffles Recipe | Life's Tidbits

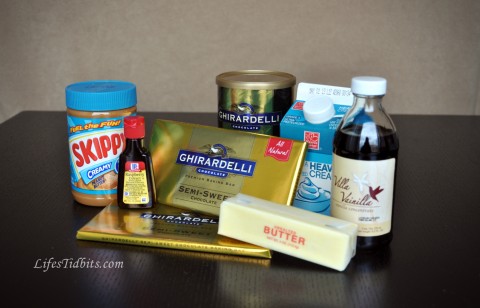
Ingredients
10 oz semisweet chocolate
1/2 cup heavy cream
2 tablespoon unsalted butter
1/2 teaspoon vanilla extract
1/2 teaspoon raspberry extract
1/4 cup peanut butter (if you are peanut butter LOVER do 1/2 a cup)
10 oz of chocolate for coating like melting chocolate
Raspberry Peanut Butter Truffles Recipe | Life's Tidbits

Directions
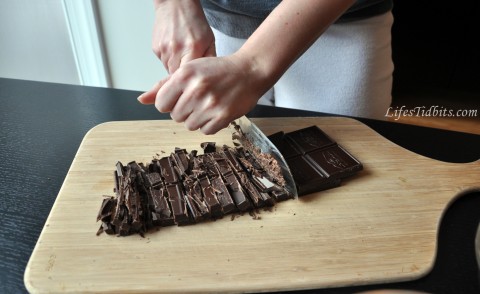
Chop the chocolate and put in a heatproof bowl.
Raspberry Peanut Butter Truffles Recipe | Life's Tidbits

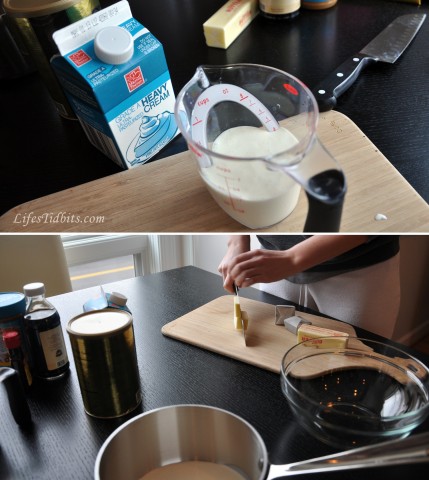
Bring the heavy cream and butter to a simmer in a saucepan over medium heat.
Raspberry Peanut Butter Truffles Recipe | Life's Tidbits

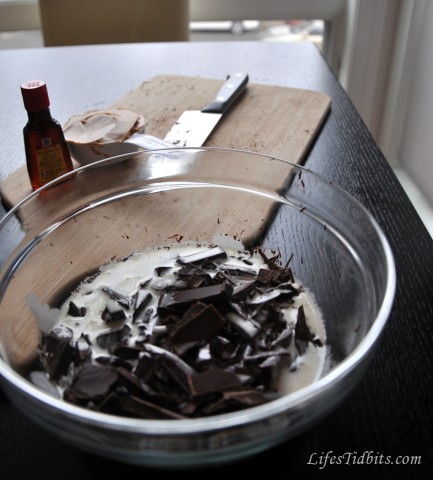
Pour cream/butter mixture over the chocolate and let sit until melted, about 10 minutes. Stir with a rubber spatula or whisk until smooth. (If necessary, microwave in 20-second intervals until the chocolate melts.)
Raspberry Peanut Butter Truffles Recipe | Life's Tidbits

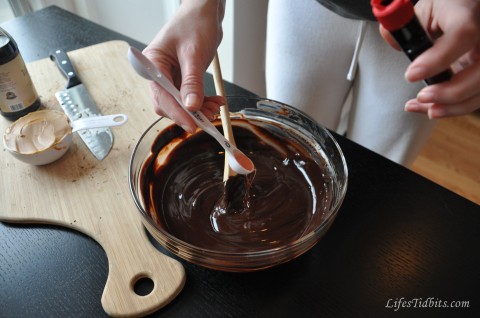
Stir in the vanilla and raspberry extracts.
Raspberry Peanut Butter Truffles Recipe | Life's Tidbits

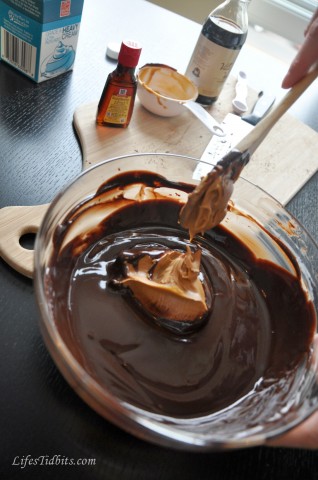
Then stir in the peanut butter. Stir until the ganache is smooth and shiny.
Raspberry Peanut Butter Truffles Recipe | Life's Tidbits

Pour into a shallow baking dish (or leave in the glass bowl as I did) and refrigerate until firm, 1-2 hours or overnight.

Roll tablespoonfuls of the ganache into 24 balls, then return to the refrigerator for at least an hour.  Heat your melting chocolate in a double broiler or in a chocolate melting pot.  Drop each truffle into the melted chocolate and cover completely.  Transfer to a parchment-lined baking sheet.  Place in the refrigerate until firm.  Store is airtight container until ready to serve.  I like to let them sit at room temperature for 20 minutes before serving to ensure the center is nice and gooey!!

Raspberry Peanut Butter Truffles Recipe | Life's Tidbits

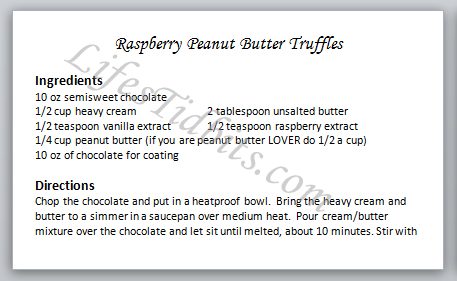
I hope you like this new tidbit!!! I’ve created an easy print recipe card for this recipe.
Raspberry Peanut Butter Truffles Recipe | Life's Tidbits

Click here for a 3×5 index card recipe card.

Recipe adapted from Food Network Magazine.

Happy Cooking!

If you enjoyed this post, please add your tidbit by commenting below.  Don’t forget you can follow us on PinterestInstagramFacebook and Twitter.
Share

We might be a few months into our second year of marriage, but this year we got our very first Christmas tree!  Our new home needs a tree.  Clearly I had my priorities in the right order since the first order of business was to go purchase ornaments.  A couple years ago when we were registering for our wedding at Crate & Barrel I had seen a lot of cute ornaments.  Our first and only stop for ornaments was at Crate & Barrel.  Luckily for us there was a 30% off sale on all the ornaments!!  My husband and I filled up our basket with lots and lots of white, silver and red ornaments.  I was pretty sure we were buying too many, but figured we would return the ones we didn’t need.

It seemed like destiny as we drove up Massachusetts Avenue and right by a Christmas tree sale at the local church.  Instead of heading the Whole Foods or Home Depot to buy our tree we were going to get it from the church!!  They had a ton of options.  I am not really sure why we didn’t think of checking out the local churches in the first place.   At least we will remember this for next year!

After walking around the available “medium” size tree options a few times we quickly agreed on this guy:

Sorry for the crappy camera phone pictures.  It didn’t dawn on me to bring my camera … fail!  Anyways, after purchasing the tree we laughed a little at our lack of planning on how we were going to get the tree home.  It might have been December, but the convertible top when down and the tree when in the backseat of the car.  We made it home just before the rain started in.  Pretty good timing if I do say so myself.

We were home and had a tree and ornaments, but we were lacking lights and maybe more importantly a tree stand.  We threw the tree in a bucket and walked to CVS.  There we purchased a tree stand and 200 white lights.  Back to the house we went to decorate our tree!!

After a number of tries we finally go the tree straight in the tree stand.  The husband cranked the Christmas music and we spent the next hour or so arranging the ornaments perfectly.  Here’s a close up of a couple of the ornaments.

I am very happy with our final product.  Check it out …

What do you think??  I’m very pleased.  Our menorah and dradle looked great next to the tree throughout Hanukkah! Maybe next year we will buy a tree skirt and actually get some gifts under the tree :)  We did have a present under the tree for less than 24 hours.  Then I couldn’t wait any longer and gave my husband his holiday present prior to Christmas Eve.

Happy Holidays!

Don’t forget to leave your tidbit by commenting :)

Share

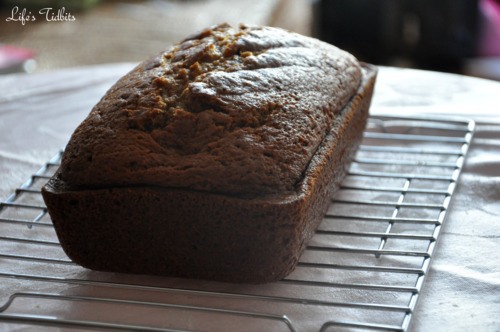
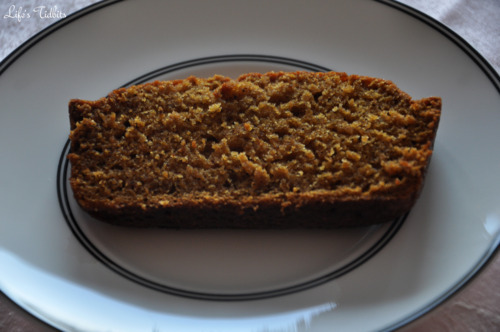
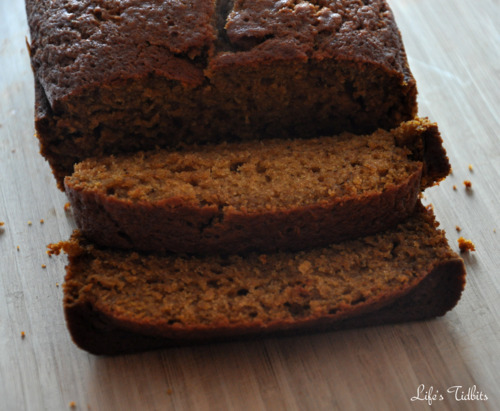
With Thanksgiving right around the corner I thought this would be the perfect time to share one of my favorite recipes for the holiday.  This recipe was originally posted back in March, but I felt it was throwback worthy.  By the way I’ve never been a pumpkin pie, bread, etc lover, but this pumpkin bread recipe was a serious game changer!!!  Below is the original post for throwback Thursday.  Enjoy! 

———————————————————————————————————————————————————–

My sister and I found this recipe for pumpkin bread one fall afternoon when trying to decide what to make that wasn’t chocolate chip cookies. :) Cookies are our go to hang out and watch a movie snack.  We ate nearly a whole loaf in one sitting (or really standing in the kitchen over the loaf of bread) it was THAT good!  It’s now a must have item in our family for Thanksgiving dinner.

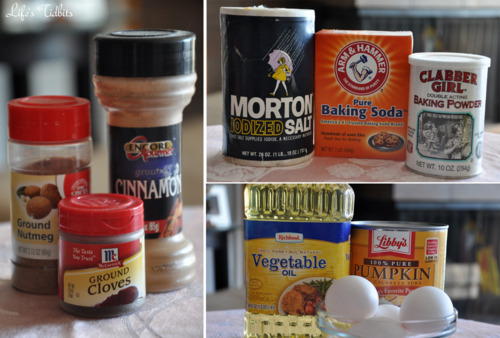
Besides the canned pumpkin most items are staples and you probably already have the ingredients in your kitchen.

Ingredients:
2 cups canned pumpkin (or homemade pumpkin puree)
3 cups sugar
1 cup water
1 cup vegetable oil
4 eggs
3 1/3 cups all purpose flour
2 teaspoons baking soda
2 teaspoons cinnamon
1 teaspoon salt
1 teaspoon baking powder
½ teaspoon nutmeg
¾ teaspoon ground cloves

Pre-heat the oven to 350 degrees.

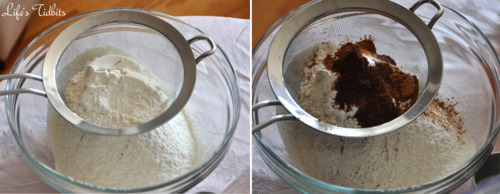
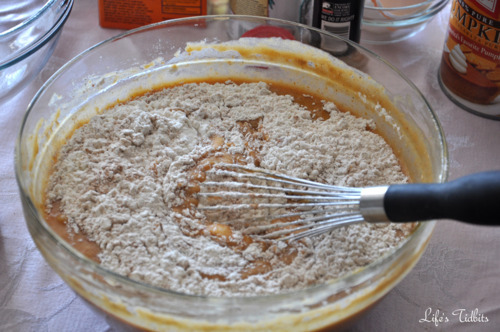
In a separate bowl sift the flour into a bowl.  On your last cup of flour add the baking soda, baking powder, cinnamon, salt, nutmeg and cloves and sift together.

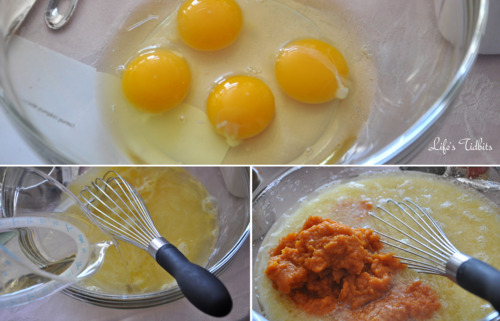
Combine pumpkin, sugar, water, oil and eggs in a bowl and beat together until mixed well.

Mix the dry ingredients with the wet ingredients slowly and beat until smooth.  Unlike chocolate chip batter this batter does NOT taste good. My sister and I made the mistake of trying the batter and thought the bread was going to be terrible.  But it’s is amazing once it is cooked, promise. So just hold off on any tasting. :)

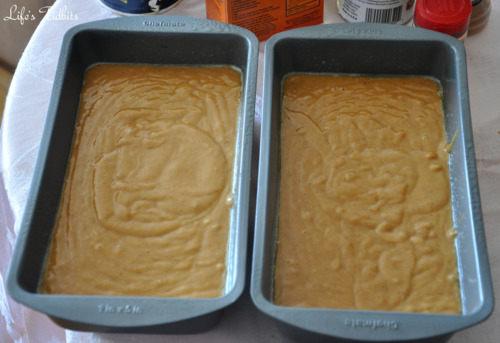
Grease two 9 x 5 inch loaf pans with Pam or any nonstick spray. For easy clean up I recommend putting tin foil in the bottom of the pans first.  Pour the batter into the 2 loaf pans and try to evenly dividing the batter between the two.

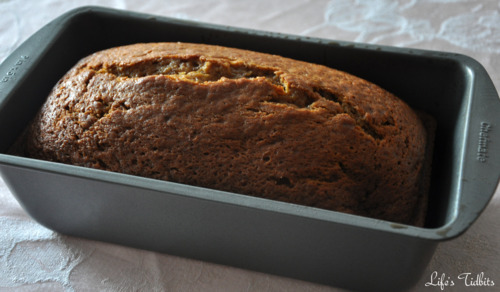
Bake at 350 degrees for 60-70 minutes or until a toothpick comes out clean.  Get ready for your house/apartment to smells OH so YUMMY as the loafs cook! Remove from oven and allow loafs to cool before cutting.

Cut and server!  And watch out because you will without a doubt eat more than one slice. :)

Happy Cooking!!

Don’t forget to leave your tidbit by commenting and/or add Life’s Tidbits to your RSS Reader :)

Recipe from the Kitchen of: BlogChef.net

Related Posts Plugin for WordPress, Blogger...
Share