Big, BIG things happening for us as of late.  Apparently we don’t know how to do low key/boring. :)

2010 – Engagement
2011 – Wedding/Honeymoon
2012 – PURCHASE OUR FIRST HOME!!!!!!!!!!
2013 – ??? I’m sure we will find something to spice things up next year!

Remember back in February when we turned 30 and went on our lovely trip to Mexico? Well the day before we left for vacation we found out the owner of the condo we rent is planning to sell.  What did this mean for us? Well it meant we had to move and do it within the next few months.  STRESSFUL! The thought that we would need to move, or that our apartment would be sold, was nowhere on our radar.

We had planned on building up our saving account a little more and then purchasing our first home.  The plan was to move at the end of the summer (or possibly early 2013).  With the news of an impending sale coming our way, the purchasing timeline was moved up.  Our move out date was no longer being driven by our savings account but by our current landlord’s desire to sell.

Despite our initial freakout everything has worked out pretty well.  We have a friend who’s a realtor so we called him the day we found out about needing to move and he got us hooked up with the lender that afternoon.  Within a week of coming back from vacation we were preapproved for a place and ready to start the big search.

While we were drinking margaritas and relaxing on the beach the husband and I came up with our must have and like to have lists for our first home.

Here is what our list looked like in order of priority …

Must Haves:

  1. Within our ideal price range
  2. In DC (not Maryland or Virginia)
  3. Pet Friendly – we can’t part with little Miss. Sophi!
  4. 2 bedrooms
  5. Washer/Dryer
  6. Walking distance to a metro

Like to Haves:

  1. Parking Space
  2. Plenty of Storage
  3. 1.5 or 2 bathrooms
  4. Patio and/or balcony
  5. Fireplace

I felt like this was a pretty good list to begin with and began stalking RedFin for listings. After looking at a few condos in person, our must have list started to change a little.  We quickly realized a large living/dining area was important to us.  Small bedrooms were okay as long as the living space was big.  I feel like I do two to three things in the bedroom.  Sleep, get dressed and watch tv. I don’t need a massive amount of space for any of those.  Also, it became very clear places under ~800 sq feet were just too small.  As it turns out the one bedroom we rent is slightly over ~800 square feet so when you add a second bedroom but don’t increase the size of the unit the living space shrinks considerably.  TIP: find out the square footage of your current place before you start looking at places (to rent or buy).  This  will help you to gauge what square footage is ideal for you.

After viewing at least 20+ places in person and probably over 100 online we ended up putting an offer in and after a week of negotiations the place was officially UNDER CONTRACT.  WOOT WOO!!!

Based on our initial list we end up with the following:

Must Haves:

  1. Within our ideal price range – FAIL we went over the initial budget
  2. In DC (not Maryland or Virginia) – CHECK
  3. Pet Friendly – CHECK
  4. 2 bedrooms – CHECK
  5. Washer/Dryer – CHECK
  6. Walking distance to a metro – CHECK

Like to Haves:

  1. Parking Space – Fail
  2. Plenty of Storage – Fail … well kind of.
  3. 1.5 or 2 bathrooms – CHECK
  4. Patio and/or balcony – CHECK
  5. Fireplace – Fail

PLUS our living/dining room is HUGE and get a ton of natural light, win win!!  Overall I would say we made out VERY well with our first homeowner purchase.

Looking back at the process here are a few things I think we did right and a few more I wish we had done:

  • Go with your gut. If you love it then you love it and if you don’t there are always more places coming onto the market so don’t settle.  For those of you who purchased a wedding dress and had “this is THE dress” moment that will happen for your home too!
  • View a lot of places and even take a look at places you aren’t sure look great online. Not all places photograph well (or the owner just puts up crappy pictures).  We found a few I wasn’t sure about online and then really liked in person.
  • Remember the paint color (or wallpaper) can always be changed!
  • Determine what the deal breakers are. For example I hated when the second bedroom didn’t have a window (which didn’t come to light until we saw a few places like this).  It didn’t bother my husband, but we agreed when things are a deal breaker for one of us then the place is out.
  • Figuring out what you can afford and comfortable spending BEFORE you start looking and don’t look out places above your price range.  I mean let’s be honest if you find a place for 100k that you like, but then look at a place for 500k 9 times out of 10 you are going to like the more expensive place.  Just don’t tease yourself it isn’t worth it I promise (same thing goes for wedding dress brides!!!).
  • Going back to the first choice place at least once before putting in an offer or shortly there after. It felt so good to walk into the condo and confirm I LOVED it.
  • Getting the paperwork in order while looking for a place. I wish I had asked the Lender for a list of the paperwork we were going to need to provide (bank statements, w-2s, paychecks, etc) to get fully approved.  The documents takes a while to compile and if you are like me, you might have forgotten how to access some of your 401k accounts online.
  • Don’t take the negotiations personally.  The seller wants the highest price possible and you want the lowest.  Some back and forth is to be expected.  We had a hard time with this because we felt our initial offer was very reasonable/fair.

And remember to RELAX and try to ENJOY purchasing your first home!!

Related blogs coming up soon: Moving, painting and other homeownership related projects.

What tips do you have for a first time home buyer?  Do you have any pre-move in tips for us?

Don’t forget to leave your tidbit by commenting below :)

Share

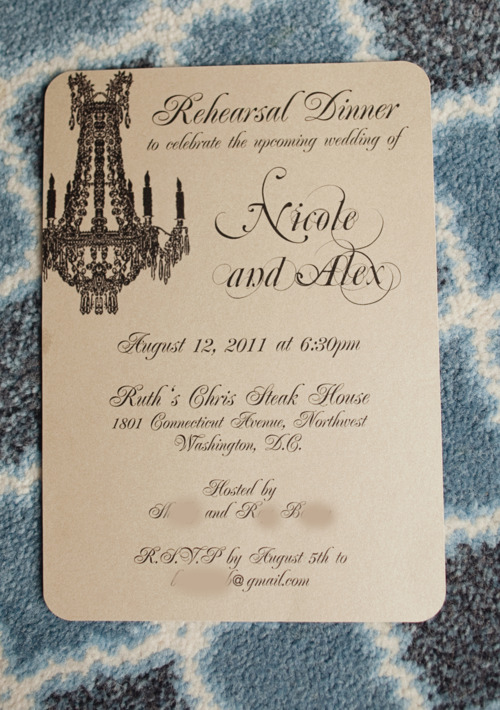
I know I am a bad blogger and I still haven’t told you about how we made our own wedding invitations, but that DIY project was a HUGE undertaking. Honestly, I’m not completely sure how to walk you through the process step by step … YET.  So instead I started thinking maybe I would just begin by sharing our DIY rehearsal dinner invitations.

After determining the location, invite list and all that fun stuff for the rehearsal dinner I decided we (the husband and I) should DIY own rehearsal dinner invites.  We had left over card stock from the wedding invite inserts as well as extra envelopes (from our DIY Calligraphy).  I mean it would have been such a waste not to take advantage of the left over paper materials, right?!?!?! ;)

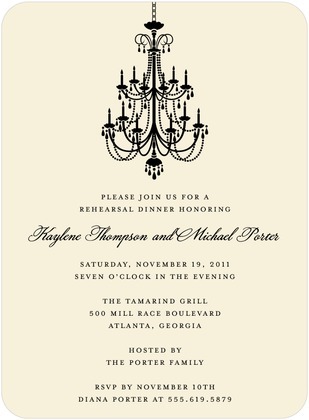
Early on I found Wedding Paper Divas. They have fabulous invitations for various occasions, in fact it is the website we purchased our save the dates from.  I quickly found this rehearsal invitation, which served as my inspiration for our DIY invites.

Image Credit: Wedding Paper Divas

What you need:

Photoshop has a 30 day FREE trail you can download.  We used a 30 day trial to create the initial draft of our wedding invitations. In the end we ended up purchasing Photoshop.  We planned to use it not only for wedding stuff, but also for my budding photography hobby!  If you plan to go the 30 day trial route, make sure to save the final version of your invitation as a PSD, JPG and TIFF file. This will ensure you are able to print the design even after your trail expires.

To ensure we could use some of our left over envelopes, I knew the invitations would need to be 5×7.  Once I had the size I found a free image online of a chandelier and downloaded it. From there I Googled rehearsal dinner text and placed it on the initial version of the invite.  After that it was just a matter of finding a layout we liked as well as fonts.

The majority of the text is in a renaissance font, which is free to download!  Then for our names I used the same font we used on our invitations for our names, again a free font you can download.  I felt using a little of the same font as the wedding invitations tied everything together.

I didn’t take a lot of pictures of the process, which is a bummer, so I can only really describe what I did.  I printed two invites on each piece of card stock and then used my handy dandy paper cutter to make them 5×7. I printed a number of test versions on plain paper before using the card stock.

This is one of the test versions, please excuse the crappy blackberry camera shot:

I had printed almost all of the rehearsal dinner invites when I remembered I had purchased a paper rounder punch. I decided to go ahead and use one of my test invites and round the corners to see how it looked.  I ended up loving it and the husband was in agreement.  A bunch of punches later we had rounded edges instead of sharp corners.

Here’s what the rehearsal dinner invitation looked like totally finished:

Here are a couple of extra tips:

  1. SPELL CHECK!
  2. Print test versions on plain white paper before doing a sample on your nice card stock.
  3. Print using High resolution.
  4. Make sure you have enough paper.  You will need extra for test prints as well as if you detect a mistake. Or if like me your ink cartridge starts to die so some invites are better than others.
  5. Start early.  Even though you don’t have to print as many rehearsal dinner invitations as wedding invites (usually) they still take time.  Better not to be up against a deadline.

Happy Planning!

Don’t forget to leave your tidbit by commenting below :)
Share

That was the BIG questions!

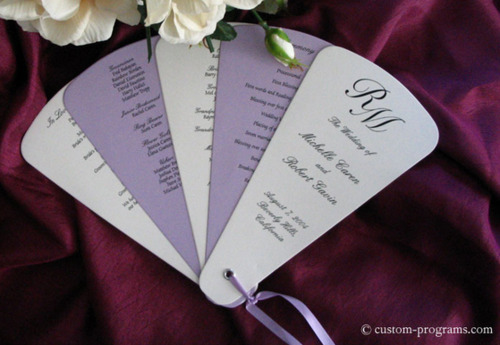
I became slightly obsessed with the whole DIY thing for the wedding and wanted to make my own wedding programs.  And not any programs, but FAN programs that looked like so:

Photo from http://cherishpaperie.com/faq/programs

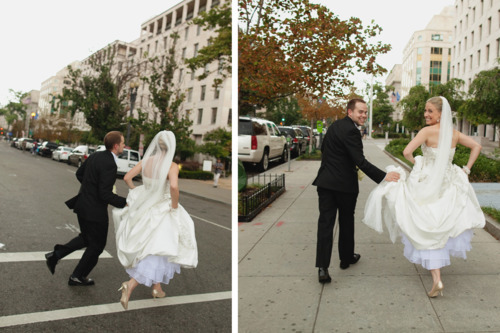
I honestly thought getting married in August with a courtyard ceremony meant everyone would be sweating to death while we walked down the aisle and said our vows.  Little did I know it would torrential down pour that day and the beautiful courtyard ceremony I had pictured in my head would never happen.  Oh poor me … I mean getting married in a beautiful hotel really is the pits, isn’t it?!?! wink wink!  Here we are running from the white house back to the hotel as the rain clouds took over the sky.  So glad we got a few pics at the white house in between the rain!!

Photo Credit: Korie Lynn Photography

Okay so enough about my non-courtyard ceremony and back to the wedding programs.  My mother was a bigger fan of these fan programs because of the embossing:

Photo from fan-wedding-programs.com

We honestly went back and forth SO many times about what the programs should look like.  My husband pretty much drew the line at another DIY project.  He thought making our wedding invitations was enough.  Not to mention the DIY escort cards, rehearsal dinner invites and menu cards.  With another DIY project out the husband said whatever made me happy would make him happy for the programs.  My mother and I went back and forth a number of times.

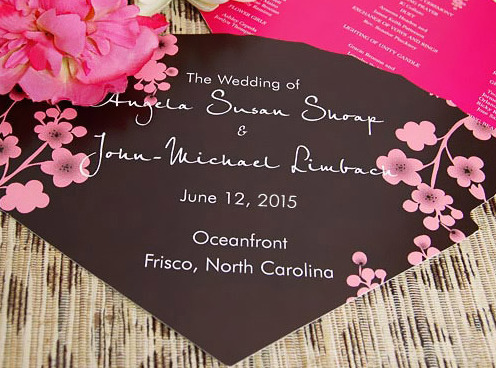
It soon came to the point where no matter where I ordered the wedding programs from I was going to have to pay for rushed shipping.  Most of them were set to arrive with standard shipping the Friday before our wedding.  Clearly that was just WAY too close to the wedding to chance it.  I finally found these:

Photo from beau-coup

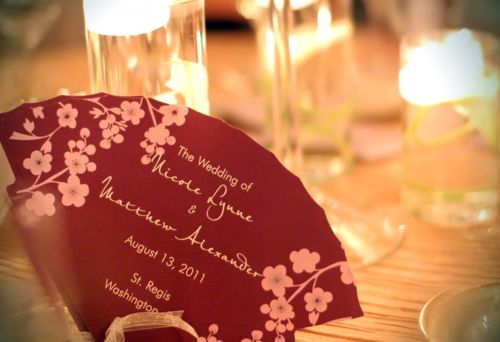
The husband was on board, so was my mom and the MOH (my sister)! Win, win, win!! With everyone in agreements I ordered the programs immediately.  Luckily it arrived without any incorrect spelling!!  I’m not going to lie the purple color wasn’t exactly what I had envisioned, but I still loved how they came out.

Photo Credit: Sara without an H

The programs came with little holes in the bottom.  I purchases sparkly white ribbon (from Michael’s) to put through the hole.  My mom and dad spent a couple hours cutting the ribbon to size and putting them on the programs the Friday before the wedding.  Nothing like me waiting until the last minute! :)

So my advice to you – please order wedding programs at least a month or two before the wedding.  AND know your limits. DIY is awesome and all, however if you don’t your limit you will over extend yourself (and loved ones) instead of enjoying the projects they will end up stress you out.  I’m glad my husband knew where the line was for me. =)

Happy wedding planning!

Don’t forget to leave your tidbit by commenting below :)

Share

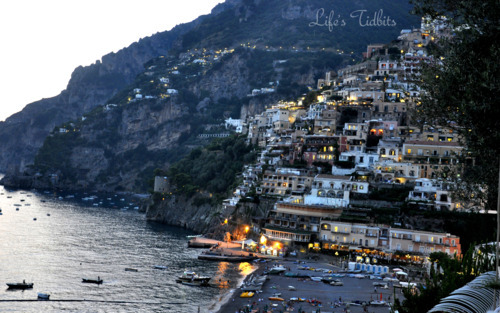
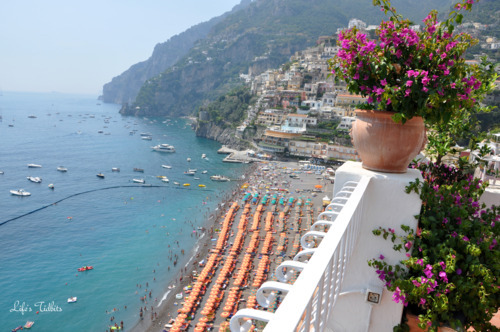
Our two week honeymoon began in Positano, Italy.  It is towards the southern end of Italy and has some fantastic views of the Amalfi Coast!  Positano also has beaches which was a must have for the first stop on our honeymoon.

Screen Shot of GoogleMaps

We decided to splurge a little in Positano. It was our time to relax, soak in being married and decompress after all that wedding planning.  We spent an evening researching hotels in Positano using TripAdvisor and Rick Steve’s guide.  When we finally stumbled upon Hotel Marincanto; I was immediately sold.  The pictures showed phenomenal views and was within walking distance of the beach!

After a red eye flight from DC to Paris and finally to Naples we arrived excited, but exhausted.  Luckily my husband had hired a driver to take us from Naples to Positano.  The streets are crazy windy and narrow. I was VERY happy to not be driving myself in a foreign country while totally exhausted!!  Hiring a driver was probably one of the best decisions we made.

Day 1:

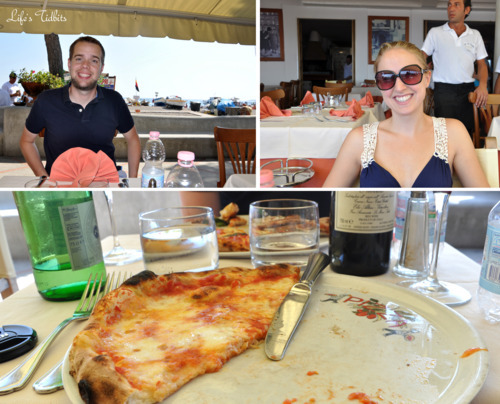
We arrived in Positano and checked into the hotel.  We were both STARVING so we changed quickly and walked down to the beach.  Unfortunately we arrived at a weird time and had to walk around for a while before finding a place serving food.  We stumbled upon Le Tre Sorelle.  It had the MOST amazing pizza.  The best pizza we had all vacation.  Seriously I dream about this pizza it was so good. We went all three days for lunch.  Ok I think you now get how amazing the pizza was!

Honeymoon in Positano Italy. Favorite restaurants and places to stay | Life's Tidbits

After lunch we walked around and then retired to our hotel for a siesta.  After a much needed nap we watched the sunset on our balcony.  Such an amazing view!

Honeymoon vacation Positano, Italy | Life's Tidbits

For dinner we went to Ristorante La Cambusa.  It was okay, but nothing to write home about.  For our first night it was fine, but I’m assuming there are other better options for your first evening in Italy!  My husband had been instructed that when you pass a gelato place you stop … always.  So as we strolled (or really rolled) back towards the hotel we stopped for our first taste of gelato.

OMG the lemon gelato was to die for and totally worth feeling extra stuffed.  :)  Off to bed we went excited to spend the entire next day at the pool or beach!

Day 2:

Reading, sun tanning and have a beer by the pool took up the whole day!  We couldn’t have asked for more perfect weather.  We chose to stay by the pool instead of going to the beach where we would have to rent mattalas.  Considering the beach was rocky there wasn’t any real need to be there when we had a gorgeous pool at our disposal, plus the view is so perfect from the suntanning patio.

Honeymoon vacation Positano, Italy | Life's Tidbits

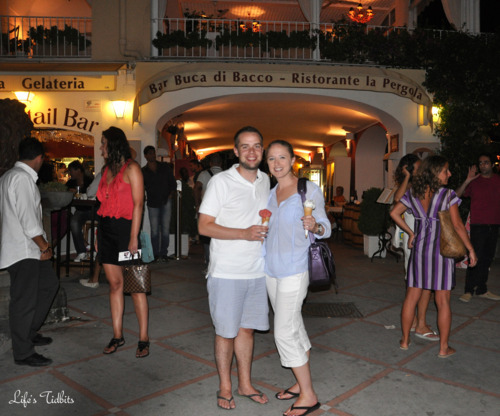
We made the trip down to the beach for lunch at Le Tre Sorelle.  When it was time to make some decisions about dinner out came the iPhone and directly to Trip Advisor app we went.  Buca di Bacco had some good reviews and we remembered walking past it the night before.  Boy did it not disappoint.  The mozzarella melted in our mouths and the gnocchi was the best we’ve ever had.  If I remember correctly it was called Sorrento gnocchi.  Either way have it if you ever go it was to die for.

Sorrento Gnocchi and tomato salad in Positano, Italy - Traveling, honeymooning, vacation | Life's Tidbits

The night ended with a “gelato cap” and was the perfect end to our second day.

Day 3:

The day was very much like day 2.  Time at the pool and then off to our favorite (and only) lunch place in Positano.  We were sad our time in Positano was coming to an end.

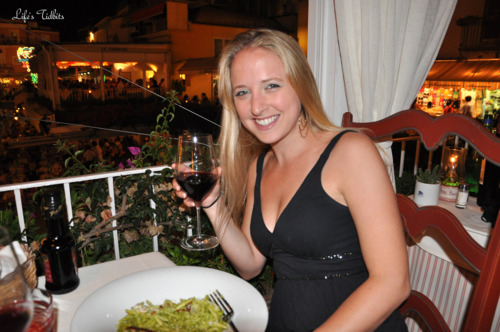
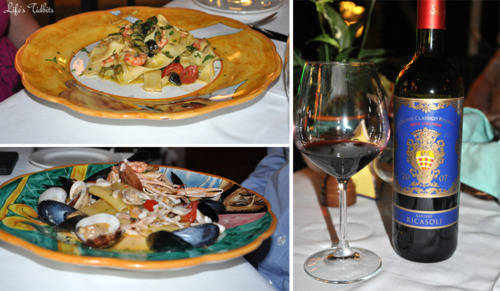
Our last dinner was at Ristorante Covo Dei Saraceni.  It was an amazing choice for our last night with top notch seafood and pasta!

Food and wine in Positano, Italy - vacation, honeymoon, traveling | Life's Tidbits

We made friends with a couple who was also honeymooning at the table next to us. It turned out that the woman works in my hometown as a school teacher.  What a small small world we live in!  After dinner we hit up a new gelato place and ended up getting the lemon gelato for the third day in a row. Some how it just didn’t get old.

Ciao and see you in Sorrento!

Happy vacationing!!

Signiture_Nicole


Share

We had received a few wedding and other party invitations with super pretty writing on the envelopes.  Specifically gorgeous calligraphy!  Despite loving calligraphy I couldn’t justify the cost of paying for hand done calligraphy on something 99.9% of people just throw away after opening the invitation.

So we went the route of DIY calligraphy.  By DIY I mean using the computer and printer, because my handwriting is less than ideal even for meeting notes. :)

Materials Needed:

First the husband and I went online and viewed a ton of different free calligraphy fonts.  After much deliberation we downloaded a free calligraphy font

We had a little over 100 invitation to address.  The envelopes we chose came in packs of 50, 250 and 500.  Clearly the 500 was over doing it, but we couldn’t decide if we should order 150 (3 packs of 50) or just go for the 250 pack of envelopes.  In the end we decided we could find other uses for the extra envelopes and went ahead and purchased 250 envelopes.

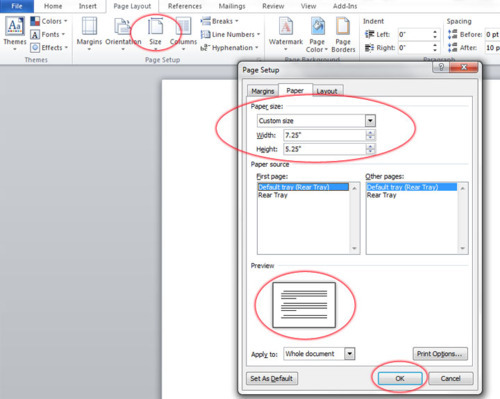
How to Create Envelopes in MS Word:

  1. Open MS Word
  2. Click Page Layout > Size > More Paper Sizes
  3. From the Paper Size drop down choose Custom Size
  4. For me I had A7 envelopes (5-1/4” x 7-1/4”)
  5. So within the width I entered 7.25 and height 5.25
  6. Click OK

DIY Calligraphy / Wedding Envelopes | Life's Tidbits

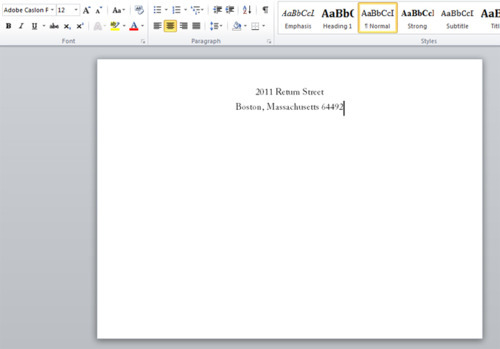
For the return address I decided to use a standard “block” font called “Adobe Caslon Pro”.  I have only received one invitation where the return address was calligraphy font, but I think this is all a matter of preference.  And since it’s DIY you can make it fit your style and font preference.

  • Type in a test address > select font, size and line spacing

Ours looked like this …

DIY Calligraphy / Wedding Envelopes | Life's Tidbits

  • Save the file someplace on your computer and clearly mark it as the return address portion of the envelope.
  • Once you are happy with how it looks print a TEST version.  I suggest plain white paper.
  • Once you are happy with how it looks go ahead and print a test version on an envelope.
  • Confirm everything looks perfect and make tweaks as necessary. Ensure you’ve spell checked as well.

At this point you can go ahead and print return addresses on all your envelopes.  If you have 130 invitations to send make an extra 10-15 envelopes with return addresses.  This will save you time if you have to reprint an address.  As you print them make sure the envelopes don’t fall on top of each other in the tray … it can cause smudging.  We lined our bookshelves with the envelopes and allowed them to dry over night before putting them in a pile.  Our apartment looked like a little printing press! :)

With the return address completed you are ready to start on the front of the envelope.  The steps are the same as above.

  • Type in a test address > select font, size and line spacing
  • Print tests on plain paper and then an envelope.
  • I think it took us at least 5-7 printed drafts to be happy.
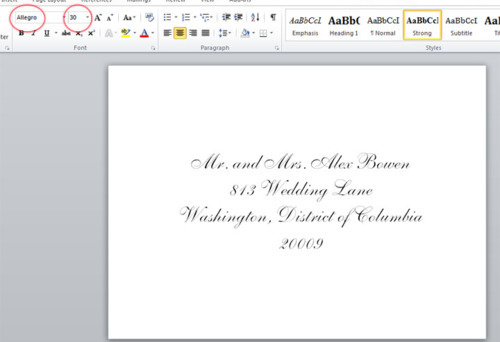
  • Once you are happy go ahead and add all the addresses into the word file (click save periodically to ensure you don’t loose your work people!!).

Here’s what ours looked like in Word:

DIY Calligraphy / Wedding Envelopes | Life's Tidbits

A Couple Tips:

  1. Print High resolution.  I printed the 1st few on standard.  They looked nice, but when the husband suggested printing on High resolution it looked better.  This does use a little more in than standard, but in the grand scheme of things I don’t think it really cost us any additional money.
  2. Buy extra envelopes.  As I already mentioned print tests on regular white paper for a while until you think it is right.  You will need envelopes for testing, but you will also find that people move or you have an address incorrect and have to reprint.  Extra envelopes purchased up front save you heartburn later, promise!
  3. Start early.  Everyone laughed when I started printing envelopes 3 months before we sent them.  Giving myself a lot of time to complete the project reduced my stress level and made it more fun. Plus it ensured I gave the envelopes plenty of time to dry before additional printing or sending.  Nothing was smudged because we were rushing.

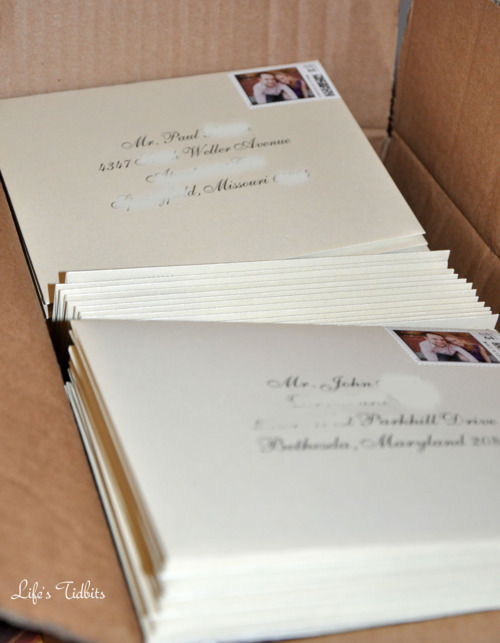
Here they are ready to be sent!  Oh how I still love those custom stamps.

DIY Calligraphy / Wedding Envelopes | Life's Tidbits

Good luck with your printing press!  If you have any questions about the process, please leave a comment … I’m happy to provide additional details!!

Happy Planning and DIY!!

signiture_nicole


Related Posts Plugin for WordPress, Blogger...
Share